Halloween Decorations

Don't fear! This ghostly centerpiece is easy to make. Wundervisuals/Getty Images

 Halloween Image Gallery
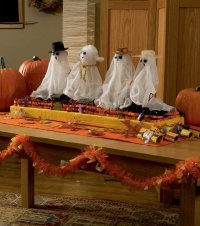
Don't fear! This ghostly centerpiece is an easy Halloween decoration to make.
Don't fear! This ghostly centerpiece
is easy to make. See more Halloween pictures.

Halloween is near, and you’re looking forward to decking the halls with haunted delights. Thankfully, you don’t need to spend a fortune at the store to set a spooky scene. This article will show you how to make your own Halloween decorations, from Halloween ornaments to creepy candles to a variety of bewitching centerpieces.

Simple step-by-step instructions and helpful photos guide you through each project. Whether you’re planning a big Halloween bash or just want to get into the Halloween spirit at home or work, these decorations are sure to delight -- and fright -- monsters of all ages.

  • Ghoulish Glow Candles

    One of the best ways to set a Halloween mood is with candles. Using everyday craft supplies, you can make ordinary pillar candles that cast a ghastly glow. Get the step-by-step instructions in this article.

  • Crystal Ball

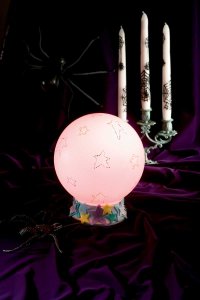
    A glowing crystal ball is the perfect creepy centerpiece for your Halloween party table. Delight the would-be fortune tellers at your party with this simple project.
  • Hats Off to Wizards Centerpiece

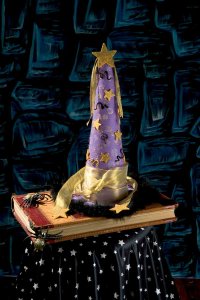
    A wizard theme can set a mystical mood for your Halloween festivities. What better than a wizard’s hat centerpiece to start the magic? Find out how to make one.
  • Glowing Window Panes

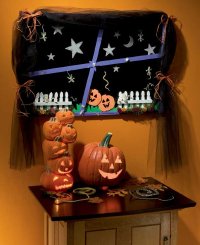
    This glow-in-the-dark wall hanging is sure to impress young ghouls and older goblins alike. Learn how to transform an ordinary chalkboard into a monster-piece.
  • Wacky Halloween Ornaments

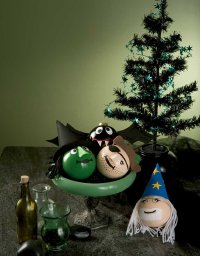
    Not just for Christmas, glass ball ornaments can easily be transformed into your favorite Halloween characters. This article will show you how to make bats, witches, wizards, and more. Or use these ideas to create your own wacky monster.
  • Spooky Sparkly Door Charm

    This sparkly decoration for your door will greet trick-or-treaters with glitz. Easy-to-follow directions and a materials list give you everything you need to trick out your door.
  • Bewitching Branch

    Make your house haunted with this spooky Halloween tree. We’ll show you how to turn a simple tree branch into a frightful sight.
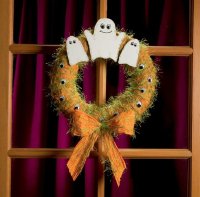
  • Fuzzy Fun Wreath

    Green, orange, and full of ghosts -- this wreath is ghastly! Learn how to make it yourself in less than ten steps.
  • There’s a Party in the Graveyard Centerpiece

    Use your imagination to customize this creepy centerpiece with your favorite graveyard frights, like ghosts, bats, spiders, tombstones, and more. Get the detailed instructions and learn what materials you’ll need.
  • Boo Pillow Pattern

    This decoration will BOOst anyone’s Halloween spirit. Use the pattern and how-tos in this article to make a colorful pillow for your favorite ghost.
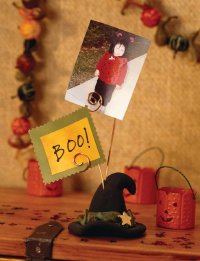
  • Haunted Hat Snapshot Holder

    Looking for a place to put your ghastly Halloween photos? This black hat does the trick. And it’s a treat to make with the simple directions we provide.
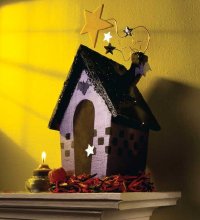
  • Spooky House Centerpiece

    Use your Halloween powers (and our directions) to transform a plain wooden birdhouse into a spook house centerpiece complete with bats and other horrors.
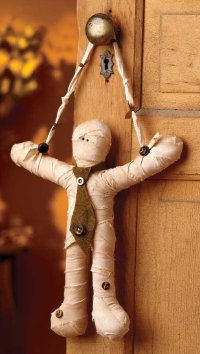
  • My Little Mummy Door Hanger

    Greet trick-or-treaters and other Halloween visitors by hanging this friendly homemade mummy on your front door. We'll show you how to make him look his age.
  • Falling Leaf Garland

    To create a festive fall atmosphere, drape colorful garlands of fall leaves around your house or office. Get the details on this autumn project.

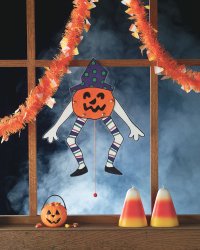
  • Jumping Jack-o'-Lantern Decoration

    Kids of all ages will adore this Jumping Jack decoration that "dances." And it's easy to make with the patterns and instructions provided.

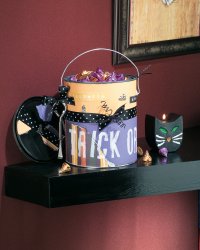
  • Tricks or Treats Paint Can

    Start with an empty paint can, and end up with a unique container for Halloween goodies. How, you ask? Just following the simple directions here.

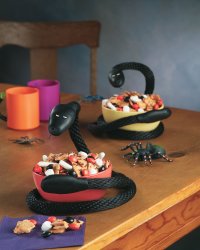
  • Slinky Snake

    See if your Halloween guests recoil in fright -- or delight -- when they see this slinky snake wrapped around the treats container. You can make this decoration in just five steps.

  • Boo! Pots

    Make a ghostly greeting using beads and clay pots. This decoration will surely BOOst your Halloween gathering.

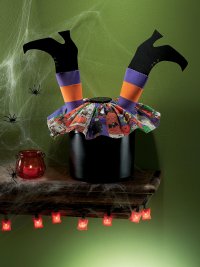
  • Witch's Brew of Surprises

    A witch has crash-landed right into the Halloween goodies container! This fun decoration is surprisingly easy to brew up if you follow our helpful directions and photos.
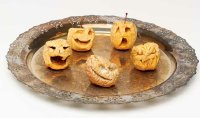
  • Heads on a Platter

    Stun Halloween guests by bringing out a gruesome platter of shrunken heads. Or place them where they're least expected for a howling good scare. Learn how to transform apples or vegetables into this unique decoration.

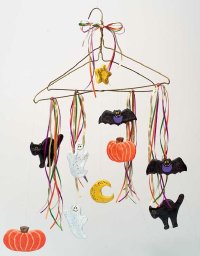
  • High Spirits Mobile

    For a spirited twist on mobiles, make a Halloween-style one with ghosts, witches, moons, stars, and bats. We'll show you how to make the characters from clay and string them up for a scare.

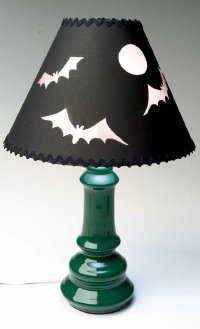
  • Night Lights

    Frightening lighting is a great way to set a Halloween mood. Discover how to make a lampshade that casts an eerie glow.

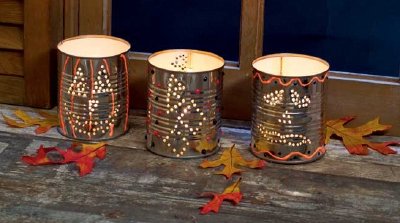
  • Creepy Candles

    There's no need to buy Halloween candles -- just make your own out of empty food cans. You can adorn them with scary faces or other designs. Light them up for a true fright!

  • Haunted House

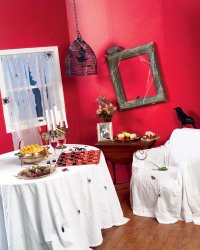
    Turn your home into a haunted house by strategically placing decorations like rats, spiders, ghosts, and even black lights. We've got a number of ways to trick out your house, Halloween-style.
  • Hex House

    Feeling superstitious? Then turn your Halloween gathering into a hex-cellent adventure with black cats, bats, an umbrella and more. You'll be lucky you did.

  • Rustic Halloween Decorations

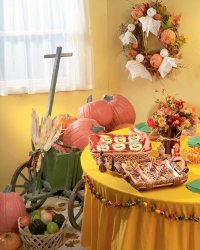
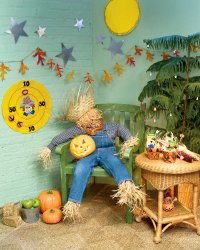
    Get back to basics with do-it-yourself decorations like haystacks, scarecrows, and a centerpiece made from twigs and flowers. We'll show you how to revisit the Halloween of long ago.

  • Pirate Ship Halloween Decorations

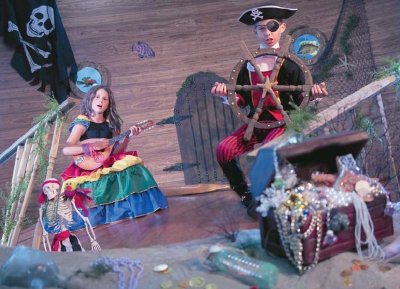
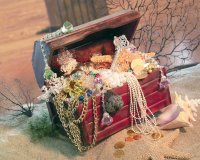
    Put some "arghh!" into your Halloween with a pirate ship theme. Find a treasure chest of seaworthy decoration ideas, including skulls and crossbones, of course.

  • Haunted Garden Decorations

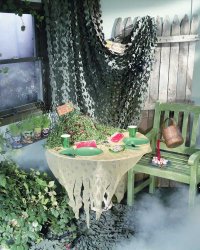
    Man-eating plants, spiders, fog -- they all add up to a ghastly Halloween garden. Get great tips on making a haunted indoor landscape.

  • Fall Decorations

    Fall decorations are synonymous with Halloween. Find out how to use raffia and even dried leaves from your yard to make striking Fall decor.

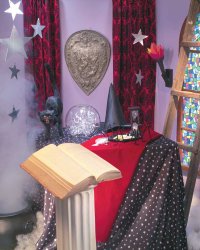
    A magic castle theme is sure to enchant all Halloween revelers. Create an ethereal atmosphere with purple streamers, shiny stars, an assortment of balloons, a crystal ball, and more. We'll show you how.

    This sweetly witchy doll is a welcoming sight for trick-or-treaters or party guests. Follow our step-by-step instructions, which even include a pattern, to make this friendly lady on your own.

  • Halloween Wreath

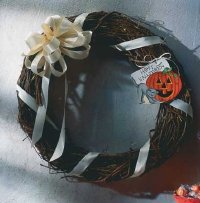
    A fun and festive Halloween wreath signals your seasonal spirit from the moment visitors get to your door. A plain grapevine wreath is totally transformed with just a little paper and paints.

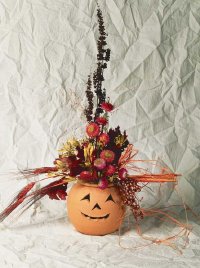
  • Floral Jack-O'-Lantern

    Create a Halloween decoration that kids and adults will enjoy when the elegance of dried flowers joins with the fun of a jack-o'-lantern. Everybody wins!

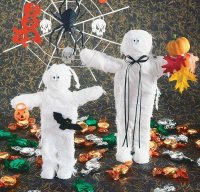
  • Junior and His Mummy

    This Halloween family is perfect for your family to make together. With just a few supplies and several minutes of wrapping, these soft mummy dolls will be ready to win you over.
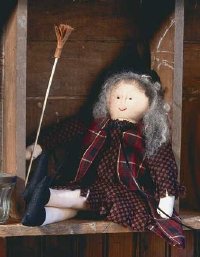
  • Henrietta Witch

    This little witch will soon win your heart with her warm and personable ways -- and she's perfect for showing trick-or-treaters where to go.

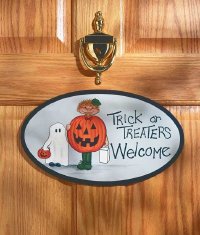
  • Halloween Welcome Sign

    Hand-painted and full of adorable details, this welcoming wooden plaque sets the party mood off right. But beware, you may gather trick-or-treaters from miles around!
  • Halloween Mobile

    Add overhead interest to a corner with this colorful foam-and-ribbon Halloween decoration, which is guaranteed to be more appealing than a cobweb.

Let the Halloween decorating begin! On the next page, learn how to make a delightful candle display.

Want to scare up more fun Halloween ideas? Try these:

  • Halloween Crafts: Not done being creative? These are great do-it-yourself projects for Halloween, from trick-or-treat boxes to candy jewelry.
  • Kids' Halloween Costumes: Try on our unique costume ideas for your ghosts and goblins.
  • Halloween Masks: Want an easy way to dress up for Halloween? Try a mask instead of a costume. Check out our selection of monstrous masks.
  • Halloween Games: Play more than 20 spooktacular games to entertain kids and adults alike.
  • Halloween Recipes: Learn how to make dozens of bewitching Halloween treats.
  • How Halloween Works: Traces the popular holiday’s Celtic roots to American traditions celebrated today.

Advertisement
Ghoulish Glow Candles

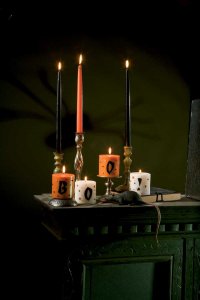
Create a spooky scene with these ghoulish candles.
Create a spooky scene with
these ghoulish candles.

These frighteningly fun candles are a great way to add moody lighting to your Halloween scene.

What You'll Need
  • Scissors
  • 4 assorted pillar candles
  • Ball-head stylus
  • Paintbrush
  • Black acrylic paint
  • Craft eyelets
  • Star brads
  • Straight pins
  • Colorful ball-head quilting pins
  • Wire cutters
  • Seed beads
  1. Using this Ghoulish Glow Candles PDF pattern, cut out inside of letters to create a stencil. Place each stencil on a candle, and mark outline with stylus. Use stylus to make groove about 1/8-inch deep. You may need to do a few passes over letters to get a good groove. Remove stencil. Don't worry if it looks less than spooktacular at this point -- paint will cover faults. Use dry paintbrush to brush out shavings from grooves.

    Use the stylus to outline the letter on the candle.
    Use the stylus to outline the letter on the candle.

  2. Paint in letter grooves with black acrylic paint; let dry. Repeat if necessary.

    Use the black acrylic paint to paint the letter you outlined.
    Use the black acrylic paint to paint the letter you outlined.

  3. Push eyelets and star brads randomly into candles. Shorten straight and quilting pins with wire cutters so they are about 1/2 inch long. Randomly push quilting pins into candles. Place seed beads on straight pins, and push them into candles.

    Push the pins and seed beads into the candle.
    Push the pins and seed beads into the candle.

Note: Never leave a lit candle unattended.

Next, we'll show you how to conjure up a mystical crystal ball centerpiece for your table.

Want to scare up more fun Halloween ideas? Try these:

  • Halloween Crafts: Not done being creative? These are great do-it-yourself projects for Halloween, from trick-or-treat boxes to candy jewelry.
  • Kids' Halloween Costumes: Try on our unique costume ideas for your ghosts and goblins.
  • Halloween Masks: Want an easy way to dress up for Halloween? Try a mask instead of a costume. Check out our selection of monstrous masks.
  • Halloween Games: Play more than 20 spooktacular games to entertain kids and adults alike.
  • Halloween Recipes: Learn how to make dozens of bewitching Halloween treats.
  • How Halloween Works: Traces the popular holiday’s Celtic roots to American traditions celebrated today.
  • Pumpkin Carving Patterns: What's Halloween without pumpkin carving? Check out these great pumpkin carving patterns.

Advertisement

Crystal Ball

This eerie crystal ball is a great Halloween centerpiece.
This eerie crystal ball is a
great Halloween centerpiece.

It doesn't take a fortune-teller to predict that this centerpiece will liven your party table.

What You'll Need
  • 73/4-inch glass ceiling globe fixture with base
  • Assorted removable star stickers
  • Glass frost spray
  • Acrylic paint: light blue, yellow, purple, teal
  • Small paintbrush
  • Adhesive-backed craft foam stars
  • Silver glitter spray
  • 2mm craft foam
  • Ruler
  • Scissors
  • Stapler, staples
  • 3 party glow sticks
  1. Remove glass globe from base. Place stickers randomly over outside of globe. Following directions on can of frost spray, spray a light, even coat of frost over entire globe. Let dry.

    Evenly apply the glass frost spray to the globe.
    Evenly apply the glass frost spray to the globe.

  2. Remove star stickers. (If stickers don't come off easily, use a blow dryer to warm them. They should come off easily.)

    Using the small paintbrush, paint around each star.
    Using the small paintbrush, paint dots around each star.

  3. Using handle end of small paintbrush, dip end into paint and dot around each star; let dry.

    Spray the base with the glitter spray and allow to dry.
    Spray the base with the glitter spray and allow it to dry.

  4. Attach foam stars around edge of base. Spray base with glitter spray; let dry.

    Group the activated glow sticks together and push them through the hole in the base.
    Group the activated glow sticks together and push them through
    the hole in the base.

  5. Place globe on base, using provided screws. Cut a 11/4 x 7-inch strip of craft foam. Create a ring, with a 21/2-inch overlap, and staple shut. Activate 3 glow sticks according to package directions right before party starts. Cluster sticks together, and slide foam ring over sticks until just above base of sticks. Push glow sticks through hole in base. (The foam protects sticks from metal's sharp edge and keeps them secure.) Replenish with fresh glow sticks as needed.

Horrifying Hint: You can also use a small flashlight to light your crystal ball by standing flashlight on end. Wrap the flashlight in foam to keep it snug inside the hole.

Next, we'll show you how to make another wicked Halloween centerpiece -- a wizard's hat. Go to the next page for the step-by-step directions and the materials you'll need.

Want to scare up more fun Halloween ideas? Try these:

  • Halloween Crafts: Not done being creative? These are great do-it-yourself projects for Halloween, from trick-or-treat boxes to candy jewelry.
  • Kids' Halloween Costumes: Try on our unique costume ideas for your ghosts and goblins.
  • Halloween Masks: Want an easy way to dress up for Halloween? Try a mask instead of a costume. Check out our selection of monstrous masks.
  • Halloween Games: Play more than 20 spooktacular games to entertain kids and adults alike.
  • Halloween Recipes: Learn how to make dozens of bewitching Halloween treats.
  • How Halloween Works: Traces the popular holiday’s Celtic roots to American traditions celebrated today.

Advertisement

Hats Off to Wizards Centerpiece

A mystical wizard's hat sets the tone for your Halloween celebration.
A mystical wizard's hat sets the tone
for your Halloween celebration.

Grab your wands, and get ready to party. This magical centerpiece is perfect for a gathering of wizards.

What You'll Need

  • 26 inches purple felt (from bolt)
  • Scissors
  • Measuring tape
  • Hot glue gun, glue sticks
  • 10-inch-diameter cardboard circle
  • 151/2-inch tall foam cone, 16-inch base
  • Glitter glue: iridescent purple, gold
  • Paintbrush
  • 20 yellow wood stars, 1 inch each
  • 3 yellow wood stars, 2 inches each
  • Small plastic snakes
  • 1 yard black maribou
  • 32 inches gold ribbon, 3/8 inch wide
  • 11/2 yards sheer gold ribbon, 11/2 inches wide
  1. Cut a 10-inch square from felt; glue felt to cardboard circle for brim. Trim. Cut a piece of felt tall enough and wide enough to fit cone. Wrap and glue felt to cone, trimming top and bottom of felt if necessary.

    Wrap and glue the felt to the cone.
    Wrap and glue the felt to the cone.

  2. With iridescent purple glitter glue, paint circles on hat and brim. Let dry. Outline circles with gold glitter glue. Glue cone to middle of brim.

    Outliine the purple circles you painted with the gold glitter glue.
    Outline the purple circles you painted with the gold glitter glue.

  3. Paint 1 side of all stars with gold glitter glue; let dry. Glue small stars and small snakes around hat and brim (leave bottom 4 inches of cone free of snakes and stars).

  4. Glue maribou around outside edge of brim. Cut 3/8-inch ribbon in half, and tie pieces together in middle (ends don't have to be even). Glue ribbon knot to top of hat. Cut ribbon ends on a diagonal.

    Glue the star to the tip of the wizard's hat.
    Glue the star to the tip of the wizard's hat.

  5. Glue a 2-inch star to top front of hat. Wrap sheer gold ribbon loosely 3 times around base, and make a loose knot in front. Glue a large star to each ribbon end, and wind ribbon ends around hat once more, bringing stars to front. Your wizard's hat is now ready to adorn your Halloween table!

You can transform a chalkboard into a ghastly glowing Halloween decoration for your wall. Find out how to make this striking project on the next page.

Want to scare up more fun Halloween ideas? Try these:

  • Halloween Crafts: Not done being creative? These are great do-it-yourself projects for Halloween, from trick-or-treat boxes to candy jewelry.
  • Kids' Halloween Costumes: Try on our unique costume ideas for your ghosts and goblins.
  • Halloween Masks: Want an easy way to dress up for Halloween? Try a mask instead of a costume. Check out our selection of monstrous masks.
  • Halloween Games: Play more than 20 spooktacular games to entertain kids and adults alike.
  • Halloween Recipes: Learn how to make dozens of bewitching Halloween treats.
  • How Halloween Works: Traces the popular holiday’s Celtic roots to American traditions celebrated today.
  • Pumpkin Carving Patterns: What's Halloween without pumpkin carving? Check out these great pumpkin carving patterns.

Advertisement

Glowing Window Panes

Whether you're hosting a child's Halloween bash or entertaining ghoul-friends, you'll take pride in displaying this wall hanging, which glows in the dark.

What You'll Need

Make this unique glowing
Make this unique glowing "window"
for your Halloween celebration.

  • 35 x 231/4-inch chalkboard
  • 3-inch wood star
  • 2 wood strips, 1 inch wide: 36 inches long, 24 inches long
  • Acrylic paint: purple, white, orange, glow-in-the-dark
  • Paintbrush
  • Two wood picket fences, 9 x 5 inches each
  • 2 wood pumpkins, 4 inches each
  • Glow-in-the-dark items: stars, moon, snakes, insects, lizards, etc.
  • Iridescent purple glitter glue
  • Tacky craft glue
  • Sheet green craft foam
  • Ruler
  • Scissors
  • Green moss
  • 10 wood autumn leaves
  • Hot glue gun, glue sticks
  • Ultra-thin wire or nylon
  • 2 yards black tulle
  • Orange raffia
  1. Paint chalkboard frame, wood star, and wood strips purple. Paint fences white and pumpkins orange. When dry, paint a coat of glow-in-the-dark paint on fences and pumpkins.

    Outline shapes with purple glitter glue.
    Outline shapes with purple glitter glue.

  2. Outline glow stars, moon, and wood star with purple glitter glue; let dry. Use purple glitter glue to make squiggly lines on wood strips and around chalkboard frame. Let dry.

    Crisscross the wood strips on the chalkboard.
    Crisscross the wood strips slightly askew on the chalkboard.

  3. Place wood strips in crisscross on chalkboard, placing them slightly askew. Glue star on top of where strips intersect.

    Cut the green foam strips with a jagged edge as shown.
    Cut the green foam strips with a jagged edge as shown.

  4. Cut foam into 21/2-inch strips. Cut a jagged edge on each strip to look like scary grass. Glue grass along bottom, above frame. Glue fence and pumpkins to bottom of window. Glue moss to front bottom of each fence, and glue leaves on top of moss.

  5. Glue stars and moon to chalkboard. Glue snakes, bugs, and creatures around window. With thin wire, hang a few snakes and lizards in random heights from top of window.

    Tie the raffia at the sides to finish the creepy curtain for your window.
    Tie the raffia at the sides to finish the creepy curtain for your window.

  6. Loosely twist and glue black tulle on each top corner of frame. Tie raffia at each corner and along sides. Your spooky window scene is ready to hang.

On the next page, we'll show you how to transform a favorite Christmas item into wacky decorations for Halloween.

Want to scare up more fun Halloween ideas? Try these:

  • Halloween Crafts: Not done being creative? These are great do-it-yourself projects for Halloween, from trick-or-treat boxes to candy jewelry.
  • Kids' Halloween Costumes: Try on our unique costume ideas for your ghosts and goblins.
  • Halloween Masks: Want an easy way to dress up for Halloween? Try a mask instead of a costume. Check out our selection of monstrous masks.
  • Halloween Games: Play more than 20 spooktacular games to entertain kids and adults alike.
  • Halloween Recipes: Learn how to make dozens of bewitching Halloween treats.
  • How Halloween Works: Traces the popular holiday’s Celtic roots to American traditions celebrated today.
  • Pumpkin Carving Patterns: What's Halloween without pumpkin carving? Check out these great pumpkin carving patterns.

Advertisement

Wacky Halloween Ornaments

These fun ornaments will liven up your Halloween.
These fun ornaments will
liven up your Halloween.

Glass ball ornaments aren't just for Christmas anymore! Use them to create a variety of fun decorations for Halloween.

What You'll Need

  • 3-inch glass ball ornaments
  • Acrylic paint: black, white, green, tan
  • Paintbrush
  • Craft foam, assorted colors
  • Scissors
  • Hot glue gun, glue sticks
  • Fabric paint: black, yellow
  • Accessories: yarn, craft wire, feathers
  1. Remove top and hanger from ornaments. Drizzle paint inside each ornament (see specific ornament directions for color instructions). Roll ornaments around to completely coat insides; add more paint if needed. Let ornaments stand for 3 or 4 days, until paint is completely dry.

    Roll the ornament until the inside is completely coated with the paint.
    Roll the ornament until the inside is completely coated with the paint.

  2. Paint eyes, mouth, teeth, and other features on outside of ornament. Place ornament on cup to dry.

  3. Cut out shapes from craft foam. Glue these and other items to add features. Some examples are given below, but create your own monster or ghoul!

Bat: Paint inside black. Paint face. Cut 2 wings from black craft foam. Add accents to the wings using black fabric paint. Hot glue wings in place.

Glue on the wings to complete the wacky bat ornament.

Witch: Paint inside green. Cut nose from green craft foam, gently fold down center, and glue in place. Use black fabric paint to make mole on nose. Paint face. Cut witch's hat and brim from black craft foam, and glue together. Cut 6-inch pieces of black yarn for hair, and glue in place. Glue hat to witch's head.

After gluing on the wizard's hair, glue on its hat.

Wizard: Paint inside tan. Paint face. Cut wizard's hat from blue craft foam, paint yellow stars on hat using yellow fabric paint. Glue hat together. Cut 6-inch pieces of white or gray yarn, and glue in place for hair. Glue hat on wizard's head. Shape glasses from a 6-inch piece of silver craft wire. Glue glasses to head.

Use the brown craft foam to make a pirate's hat.

Pirate: Paint inside tan. Paint face (only paint 1 eye), adding dots of stubble. Cut three 4 x 11/2-inch rectangles from brown craft foam for pirate's hat. Scallop top edge of rectangles. Glue ends together to form hat, and glue on feather. Glue hat to pirate's head. Cut out black eye patch, and glue on.

Display your ornaments on a Halloween tree, place them in a bowl for a centerpiece, or hang them anywhere -- use your imagination.

Next, learn how to make a glittery Halloween door charm to welcome trick-or-treaters or other Halloween visitors.

Want to scare up more fun Halloween ideas? Try these:

  • Halloween Crafts: Not done being creative? These are great do-it-yourself projects for Halloween, from trick-or-treat boxes to candy jewelry.
  • Kids' Halloween Costumes: Try on our unique costume ideas for your ghosts and goblins.
  • Halloween Masks: Want an easy way to dress up for Halloween? Try a mask instead of a costume. Check out our selection of monstrous masks.
  • Halloween Games: Play more than 20 spooktacular games to entertain kids and adults alike.
  • Halloween Recipes: Learn how to make dozens of bewitching Halloween treats.
  • How Halloween Works: Traces the popular holiday’s Celtic roots to American traditions celebrated today.
  • Pumpkin Carving Patterns: What's Halloween without pumpkin carving? Check out these great pumpkin carving patterns.

Advertisement

Spooky Sparkly Door Charm

Halloween gets glitzy with this fun door charm. Glitter, glow-in-the-dark ghosts, and pumpkins with pizzazz accent this festive piece.

Welcome guests in style with this glitzy door decoration.
Welcome guests in style with this
glitzy door decoration.

What You'll Need

  • 66 inches lightweight armature or garden wire
  • Tape measure
  • Pliers
  • Heavy-duty wire clippers
  • Polymer clay:1 ultralight, 2 black, 2 Granny Smith, 2 glow-in-the-dark
  • Flat baking tray
  • Large capacity toaster or convection oven
  • Oven thermometer
  • Black acrylic paint
  • 1/2-inch flat paintbrush
  • Pasta machine
  • Waxed paper
  • Translucent liquid clay
  • Glitter: black ice, orange surprise, sparkling snow, majestic purple
  • Clay blade
  • 7/8-inch leaf shape cutter
  • Inks: tangerine, Santa Fe red, passion purple
  • Needle tool (or toothpick)
  • Paper towels

Note: An acrylic roller may be used instead of a pasta machine. The higher the number mentioned, the thinner you should make the sheet when rolling clay out.

  1. With pliers, bend a 1-inch loop about 4 inches from an end of armature wire. Twist end of wire below loop for about 11/2 inches. With long end of wire, make a bend about 8 inches down and double wire back to top. At wire fold, form a 3/4-inch loop, and twist 2 wires together above loop for side branch. To form center branch, make a bend about 12 inches down from top and double wire back to top. Form a 1-inch loop at fold, and twist 2 wires together. Form third branch as you did first. Twist end of wire around center branch, and trim excess wire. Form loops at bottom of each branch into diamonds, and curve each branch.

    Form the wire branches as shown.
    Form and twist the wire branches as shown.

  2. Using ultralight clay, pinch off small pieces and cover armature. Bake 20 minutes at 275 degrees F. Let cool, then paint top side of clay black. Let dry. Turn piece over, and paint back black. Let dry.

  3. Pull off a pinch of black clay, and set it aside for ghost eyes. Mix remaining black clay with an equal amount of ultralight clay. Roll into several 4 x 6-inch sheets on #2 setting of pasta machine. Lay a sheet of clay on waxed paper. Spread a thin, even layer of liquid clay over surface. Sprinkle with black ice glitter. Use a swirling motion with fingertip to spread glitter over surface. Add more glitter if necessary. Shake off excess glitter. Repeat for remaining clay sheets. Use leaf cutter to cut shapes from clay sheets; make about 70 leaves.

    Sprinkle the black ice glitter over the liquid clay surface.
    Sprinkle the black ice glitter over the liquid clay surface.

  4. Place waxed paper on baking tray; lay armature on top. Spread a thin, even coat of liquid clay over branches. Starting at bottom of each branch, attach black leaves in layers until all branches are covered. Add extra liquid clay to attach top layers. Save 8 to 10 leaves for next step. When done placing leaves, bake for 20 to 30 minutes at 275 degrees F. Let cool completely.

  5. With Granny Smith clay, roll four 8 x 1/4-inch-thick snakes and two 12 x 1/4-inch-thick snakes. Twist two 8-inch snakes together, and taper an end to a point. Squeeze a line of liquid clay down center of a shorter branch, and press twisted green stem in place, trimming excess clay at top. Repeat for other branches (12-inch snakes are for center branch). Add remaining leaves over top of stems with liquid clay.

    Make the twisted stems with the Granny Smith clay.
    Make the twisted stems with the Granny Smith clay.

  6. Roll a sheet of ultralight clay on #1 setting. Place sheet on waxed paper, and squeeze tangerine and Santa Fe red inks over surface of sheet. Let ink dry, then knead color into clay. Roll four 1-inch balls. Squeeze a small amount of liquid clay onto a ball. Dip ball into orange surprise glitter. Roll ball between palms to coat it evenly with glitter. Add more liquid clay and glitter if necessary. Tap off excess glitter. Repeat for remaining 3 balls. Gently flatten each ball into an oval, and cut ovals in half for pumpkins. Make lines with needle tool. Roll a 1/4-inch-wide snake of Granny Smith clay, and cut eight 1/4-inch pieces. Add stem texture with needle tool, and attach stems to pumpkins with liquid clay. Roll a long 1/16-inch-thick snake, and cut it into 2-inch lengths. Attach 1 to each pumpkin with liquid clay, making a swirl at end. Attach 7 pumpkins to base with liquid clay.

  7. Mix glow-in-the-dark clay with an equal amount of ultralight clay. Roll five 1-inch balls from mixed clay. Flatten a ball into a disk, and roll disk through pasta machine on #1 setting and then #2 setting. Turn clay sheet 1/4 turn, and roll through again on #3 and then #4 setting to make a thin, flat oval of clay. Place sheet on waxed paper, and spread a thin, even coat of liquid clay over surface. Sprinkle sparkling snow glitter over surface, and swirl with finger for complete coverage. Repeat for other 4 ovals. Roll five 5/8-inch balls of mixed clay. Make a ball into a slightly flattened oval. Drape a glittered clay sheet over flattened oval to create ghost. Repeat for other 4 ghosts. Make ten 1/16-inch balls of black clay. Roll balls into ovals and flatten. Attach 2 ovals to each ghost for eyes. Add liquid clay to back side of each ghost, and attach them to base.

    Roll the clay through the pasta machine to make a thin, flat oval.
    Roll the clay through the pasta machine to make a thin, flat oval.

  8. Roll out a sheet of ultralight clay on #1 setting so piece is about 5 x 6 inches. Lay clay sheet on waxed paper, and cover surface with passion purple ink. Let ink dry completely. Turn sheet over, and ink other side. Let dry, then mix color in clay. Roll clay into 6-inch-long sheet on #1 setting. Spread thin coat of liquid clay over surface of sheet. Sprinkle purple glitter over surface, and rub it onto sheet using a circular motion. Tap off excess glitter. Flip sheet over, and glitter other side. Cut a 5/8-inch-wide strip of clay, and cut ends on diagonal. Fold strip into a V for ribbon tails. Put a dot of liquid clay at top of door charm below hanging loop, and attach V. Arrange ribbon ends so they "flow." Cut 4 strips 6 x 5/8 inches each. Fold each strip in half, gluing ends together with liquid clay. Attach loops on top of V with liquid clay. Shape bow so it "flows." Attach last pumpkin to center of bow with liquid clay.

    Use liquid clay to attach the last pumpkin to the middle of the bow.
    Use liquid clay to attach the last pumpkin to the middle of the bow.

  9. Bake door charm 30 minutes at 275 degrees Fahrenheit; let cool. Your door charm is ready to hang and greet your guests!

Looking for another glittery Halloween piece? Continue to the next page for a bewitching Halloween tree project.

Want to scare up more fun Halloween ideas? Try these:

  • Halloween Crafts: Not done being creative? These are great do-it-yourself projects for Halloween, from trick-or-treat boxes to candy jewelry.
  • Kids' Halloween Costumes: Try on our unique costume ideas for your ghosts and goblins.
  • Halloween Masks: Want an easy way to dress up for Halloween? Try a mask instead of a costume. Check out our selection of monstrous masks.
  • Halloween Games: Play more than 20 spooktacular games to entertain kids and adults alike.
  • Halloween Recipes: Learn how to make dozens of bewitching Halloween treats.
  • How Halloween Works: Traces the popular holiday’s Celtic roots to American traditions celebrated today.
  • Pumpkin Carving Patterns: What's Halloween without pumpkin carving? Check out these great pumpkin carving patterns.

Advertisement

Bewitching Branch

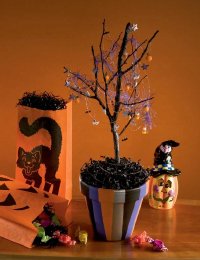
This glittery tree is so fun that you won't want to put it away when Halloween is over!

You can turn an ordinary tree branch into a spooky Halloween tree.
You can turn an ordinary tree branch
into a spooky Halloween tree.

What You'll Need

  • 6-inch terra-cotta pot
  • Painter's tape
  • Acrylic paint: black, orange, purple, silver
  • Foam brush
  • Firm tree branch
  • Spray paint: black, glitter
  • 5-inch form ball
  • Crinkle filler paper
  • Purple eyelash yarn scrap
  • Silver spiral tinsel
  • Craft wire
  • Wire cutters
  • Needle-nose jewelry pliers
  • Seed beads: assorted sizes in Halloween colors
  • Assorted trinkets: beads, buttons, charms, small toys, Halloween confetti, etc.
  1. Use painter's tape to create stripes around pot. Paint alternating black, orange, purple, and silver stripes. Let dry. Spray tree branch with black paint; let dry. Spray branch with glitter. Let dry.

  2. Push foam ball into base of pot. Scatter crinkle paper on top to hide foam. Push branch into foam ball. Arrange crinkle paper if necessary.

  3. Place eyelash yarn in and around branches as a garland. Wrap silver spiral tinsel around branches.

    Make the garland by threading the beads onto the craft wire.
    Make the garland by threading the beads onto the craft wire.

  4. Cut a 22-inch length of wire, and make a loop at an end. String beads onto craft wire in whatever pattern you'd like. When wire is almost covered, make a loop of wire at end. String beaded wire onto tree as a garland.

    To create tree ornaments, string the trinkets onto the wire branches.
    To create tree ornaments, string the trinkets onto the wire branches.

  5. String trinkets onto pieces of wire to create ornaments. Twist a wire end into a loop around trinkets, then create a circle loop at other wire end. Cut excess wire. Decorate branch with trinkets.

Your finished tree makes a perfect centerpiece for a creepy Halloween table. Not all Halloween decorations need to be scary, however. Make a Fuzzy Fun Wreath to draw smiles -- not shrieks -- from your guests. Go to the next page for the detailed instructions.

Want to scare up more fun Halloween ideas? Try these:

  • Halloween Crafts: Not done being creative? These are great do-it-yourself projects for Halloween, from trick-or-treat boxes to candy jewelry.
  • Kids' Halloween Costumes: Try on our unique costume ideas for your ghosts and goblins.
  • Halloween Masks: Want an easy way to dress up for Halloween? Try a mask instead of a costume. Check out our selection of monstrous masks.
  • Halloween Games: Play more than 20 spooktacular games to entertain kids and adults alike.
  • Halloween Recipes: Learn how to make dozens of bewitching Halloween treats.
  • How Halloween Works: Traces the popular holiday’s Celtic roots to American traditions celebrated today.
  • Pumpkin Carving Patterns: What's Halloween without pumpkin carving? Check out these great pumpkin carving patterns.

Advertisement

Fuzzy Fun Wreath

Tired of the same ghosts and ghouls every year? Mix things up this Halloween by costuming your front door in this fantastically furry wreath!

This lighthearted Halloween wreath welcomes trick-or-treaters.
This lighthearted Halloween wreath
welcomes trick-or-treaters.

What You'll Need

  • Orange paper twist
  • Scissors
  • Straw wreath
  • Hot glue gun, glue sticks
  • Black spray paint
  • Lime green fun fur yarn
  • Pencil
  • White foam core board
  • Knife tool or craft knife
  • Acrylic paint: hippo grey, black
  • Stencil brush
  • Oval wiggle eyes:4 small, 13 to 15 medium
  1. Cut paper twist into approximately 1 yard pieces, and untwist pieces. Wrap paper twist around wreath, securing ends on back of wreath with glue.

    Carefully wrap the orange paper twist around the wreath.
    Carefully wrap the orange paper twist around the wreath.

  2. Place wreath on newspaper in a well-ventilated area. Lightly spray paint wreath -- you just want small dots of black, not total coverage. Let paint dry. Wrap wreath with yarn; secure ends of yarn on back of wreath with glue. Double a 24-inch piece of yarn, and glue it to the back of wreath for a hanger.

  3. Using these patterns, trace 1 large ghost and 2 small ghosts on foam core. Cut out. Lightly stipple hippo grey paint around edges of ghosts with stencil brush.

    Using the hippo grey paint, lightly dot the edges of the ghosts.
    Using the hippo grey paint, lightly dot the edges of the ghosts.

  4. Set small wiggle eyes on small ghosts, and trace around eyes. Do the same with medium eyes and large ghost. Paint traced ovals, painting slightly outside traced line. Paint mouth on large ghost. Let paint dry. Glue eyes on ghosts.

  5. Glue ghosts to wreath, with large ghost at top center and small ghosts to each side. Glue remaining wiggle eyes to wreath.

    Use a hot glue gun to attach the ghosts to the wreath.
    Use a hot glue gun to attach the ghosts to the wreath.

  6. Make a bow from untwisted paper twist and yarn. Glue to bottom of wreath.

Hang your finished wreath on your front door to greet ghosts and goblins. Or, hang it inside your house for a festive Halloween touch. Next, learn how to craft a gruesome graveyard scene to haunt your Halloween table. We'll show you the way, step-by-step.

Want to scare up more fun Halloween ideas? Try these:

  • Halloween Crafts: Not done being creative? These are great do-it-yourself projects for Halloween, from trick-or-treat boxes to candy jewelry.
  • Kids' Halloween Costumes: Try on our unique costume ideas for your ghosts and goblins.
  • Halloween Masks: Want an easy way to dress up for Halloween? Try a mask instead of a costume. Check out our selection of monstrous masks.
  • Halloween Games: Play more than 20 spooktacular games to entertain kids and adults alike.
  • Halloween Recipes: Learn how to make dozens of bewitching Halloween treats.
  • How Halloween Works: Traces the popular holiday’s Celtic roots to American traditions celebrated today.
  • Pumpkin Carving Patterns: What's Halloween without pumpkin carving? Check out these great pumpkin carving patterns.

Advertisement
There's a Party in the Graveyard Centerpiece

This two-sided graveyard centerpiece will make any table even more festive and spooktacular!

What You'll Need

This ghostly graveyard will BOOst your table's Halloween spirit.
This ghostly graveyard will BOOst
your table's Halloween spirit.

  • Yellow tissue paper
  • Large foam block: 35 x 12 x 2 inches
  • Hot glue gun, glue sticks
  • 4 paint stir sticks
  • Acrylic paint: white, black, orange
  • Paintbrush
  • 4 foam balls, 3 inches each
  • 3 yards white cheesecloth
  • 4 yards orange ribbon, 3/8 inch wide
  • Scissors
  • 16 large wiggle eyes
  • 10 inches jumbo loopy white chenille
  • 3 doll hats
  • Gold cord
  • 50 toothpick-size dowels
  • Miniature Halloween trinkets: spiders, bats, insects, gargoyles, shovels, tombstones, wishing well, rakes, etc.
  • 1/2 yard black tulle, cut in half
  • Party shred
  1. Wrap and glue yellow tissue paper around foam block.

  2. Paint stir sticks white; let dry. Glue a foam ball to top of each stick. Space sticks evenly along foam block, about 71/2 inches apart, and insert into foam.

    Attach a foam ball to the top of each stick.
    Attach a foam ball to the top of each stick.

  3. Fold white cheesecloth in half, and place length over foam balls on sticks. Gather cloth between sticks to create ghosts. Tie gathers with orange ribbon.

    Place the cheesecloth over the assembled balls and sticks.
    Place the cheesecloth over the assembled balls and sticks.

  4. Glue 2 wiggle eyes on each side of foam balls. On each side of each ghost, paint a mouth. Glue loopy chenille on a ghost for hair; turn up ends. Sponge paint straw hat with black and orange paint, if desired. Glue hats to other ghosts' heads. Tie gold cord around a ghost's neck.

    Glue on the wiggle eyes.
    Glue the wiggle eyes onto each ghost.

  5. Paint dowels black; let dry. Push dowels around outside edge of foam, placing them about 1 inch apart. Don't worry about spacing them perfectly; the unevenness is spookier. Weave 2 rows of orange ribbon between dowels.

  6. Glue spiders, bats, insects, gargoyles, shovels, tombstones, and other trinkets throughout foam. Loosely weave black tulle between base of ghosts; glue in spots to hold. Place party shred around ghosts.

    For a finishing touch, scatter the party shred around the ghosts.
    For a finishing touch, scatter the party shred around the ghosts.

Your ghastly party in the graveyard is ready to adorn your table and entertain your guests. The next do-it-yourself Halloween decoration is even more boo-tiful. Read the next page for the frightening details.

Want to scare up more fun Halloween ideas? Try these:

  • Halloween Crafts: Not done being creative? These are great do-it-yourself projects for Halloween, from trick-or-treat boxes to candy jewelry.
  • Kids' Halloween Costumes: Try on our unique costume ideas for your ghosts and goblins.
  • Halloween Masks: Want an easy way to dress up for Halloween? Try a mask instead of a costume. Check out our selection of monstrous masks.
  • Halloween Games: Play more than 20 spooktacular games to entertain kids and adults alike.
  • Halloween Recipes: Learn how to make dozens of bewitching Halloween treats.
  • How Halloween Works: Traces the popular holiday’s Celtic roots to American traditions celebrated today.
  • Pumpkin Carving Patterns: What's Halloween without pumpkin carving? Check out these great pumpkin carving patterns.

Advertisement

Boo Pillow Pattern

This boo-tiful pillow is simple to make.
These boo-tiful pillows are easy to make.

BOOst your spirits with a Halloween greeting spelled out on brightly colored pillows.

What You'll Need

  • Polyester craft felt: orange, yellow, white
  • White chalk
  • Pinking shears
  • Sewing machine
  • Matching thread
  • Polyester fiberfill
  1. Fold each piece of felt in half to create a doubled piece of felt wide enough to fit pattern plus 1 inch.

  2. Trace the letter patterns onto felt using white chalk. (You'll use the same "O" pattern twice.) Cut out letters. (You'll have 2 of each color.)

    Trace the letter pattens onto the felt and cut them out.
    Trace the letter pattens onto the felt and cut them out.

  3. Sew the doubled letters together 1/2 inch in from the outside edge, leaving a 4-inch opening at the bottom of each for stuffing. Sew inside "holes" of each letter before stuffing.

    Sew the doubled letters together 1/2 inch from the outside edge.
    Sew the doubled letters together 1/2 inch from the outside edge.

  4. Stuff each letter with fiberfill, and sew the bottom opening closed.

Arrange the finished pillows to spell out a ghost's favorite greeting.

The next Halloween decoration we'll show you how to make is also a handy holder for your favorite Halloween photos. Continue to the next page for the materials list and directions.

Want to scare up more fun Halloween ideas? Try these:

  • Halloween Crafts: Not done being creative? These are great do-it-yourself projects for Halloween, from trick-or-treat boxes to candy jewelry.
  • Kids' Halloween Costumes: Try on our unique costume ideas for your ghosts and goblins.
  • Halloween Masks: Want an easy way to dress up for Halloween? Try a mask instead of a costume. Check out our selection of monstrous masks.
  • Halloween Games: Play more than 20 spooktacular games to entertain kids and adults alike.
  • Halloween Recipes: Learn how to make dozens of bewitching Halloween treats.
  • How Halloween Works: Traces the popular holiday’s Celtic roots to American traditions celebrated today.
  • Pumpkin Carving Patterns: What's Halloween without pumpkin carving? Check out these great pumpkin carving patterns.

Haunted Hat Snapshot Holder

A pinch of this, a handful of that, and POOF! You'll be spellbound at the simplicity of this handy hat, which is perfect for holding photos, recipes, or magical messages.

Make this haunted hat to display your favorite frightful photos.
Make this haunted hat to display
your favorite frightful photos.

What You'll Ne­ed

  • Black modeling clay
  • 24 inches copper wire, 20 gauge
  • Needle-nose pliers with wire cutter
  • 1 foot green iridescent wire ribbon
  • Scissors
  • 1 gold star button
  • Hot glue gun, glue sticks
  1. Shape clay into a hat by making a 4-inch circle for the base and a 4-inch cone for the pointed crown.

  2. Combine the shapes by pressing the black cone firmly onto the base. Gently pull the tip of the cone over to one side, and mold into a drooping point. Slightly turn up the edges of the base on the opposite side to create an upturned brim. Let harden for at least 8 hours.

  3. Cut 2 pieces of wire: one 15 inches and one 9 inches. Use pliers to grasp one end of the wire; gently curve it to create a swirl. Repeat on the second wire. Stick the sharp ends of the wires into the side of the hat.

    Carefully curl the wire into a swirl.
    Carefully curl the wire into a swirl.

  4. Hot-glue the ribbon where the cone meets the base of the hat. Cut off excess ribbon, and hot-glue the star on the ribbon at the front of the hat.

Now your haunted holder is ready to show off your scary photos, wicked recipes, and more. Another great way to haunt your house for Halloween is with a haunted house centerpiece. The next page will show you how to turn an ordinary wooden birdhouse into a house of horrors.

Want to scare up more fun Halloween ideas? Try these:

  • Halloween Crafts: Not done being creative? These are great do-it-yourself projects for Halloween, from trick-or-treat boxes to candy jewelry.
  • Kids' Halloween Costumes: Try on our unique costume ideas for your ghosts and goblins.
  • Halloween Masks: Want an easy way to dress up for Halloween? Try a mask instead of a costume. Check out our selection of monstrous masks.
  • Halloween Games: Play more than 20 spooktacular games to entertain kids and adults alike.
  • Halloween Recipes: Learn how to make dozens of bewitching Halloween treats.
  • How Halloween Works: Traces the popular holiday’s Celtic roots to American traditions celebrated today.
  • Pumpkin Carving Patterns: What's Halloween without pumpkin carving? Check out these great pumpkin carving patterns. 

Spooky House Centerpiece

A little Halloween magic transforms an ordinary wooden birdhouse into a charismatic cottage with a crooked chimney, spooky bat accents, and a glittery black roof.

What You'll Need

This haunted house will be the highlight of your Halloween table.
This haunted house will be the
highlight of your Halloween table.

  • Wooden birdhouse
  • Needle-nose pliers
  • Wood filler
  • Sandpaper
  • Acrylic paint: purple, black, yellow
  • 4 foam paintbrushes
  • Wooden star cutout
  • Pencil or white colored pencil
  • Lightweight cardboard or craft foam
  • Construction paper: black, blue
  • Scissors
  • Craft glue
  • Black modeling clay
  • Hot glue gun, glue sticks
  • Copper wire: 18 gauge, 22 gauge
  • Wire cutters
  • 6 silver star sequins
  • Glitter: black, crystal
  • Raffia: black, orange
  • Floral accent pumpkin
  1. If the birdhouse has a perch, pull it out using needle-nose pliers. Fill the hole with wood filler; let dry. Sand smooth.

  2. Paint the house purple and the roof black. Paint the wooden star yellow. Let dry.

  3. Draw a checkerboard pattern onto lightweight cardboard or craft foam; cut out. Stencil checks around the middle of the house using black paint. Let dry.

    Use the stencil to paint a checkerboard pattern onto the middle of the house.
    Use the stencil to paint a checkerboard pattern onto the middle of the house.

  4. Trace the door pattern onto black construction paper; cut out. Use craft glue to glue the door on the front of the house, covering the hole and perch area.

  5. Mold a crooked chimney out of modeling clay. Let harden for at least 8 hours. Hot-glue chimney to the roof.

  6. Cut 18-gauge wire into a 6-inch length, and bend into a curved line. Hot-glue this wire to the back of the wooden star. Stick the other end deep inside the chimney to hold in place.

  7. Cut 22-gauge wire into 3 pieces, approximately 3 to 4 inches each. Bend into curvy lines. Sandwich one end of the wire between 2 silver star sequins, and hot-glue the 3 pieces together. Repeat with the other 2 wires. Stick the ends of the wires deep into chimney.

  8. Use a paintbrush to paint craft glue along the sides and on top of the roof. Generously sprinkle black glitter on glue. Put a large glob of hot glue on top of the chimney to secure the wires, and sprinkle with black glitter.

  9. Trace the bat pattern onto blue construction paper 4 times; cut out. Fold them down the middle, making creases. Dab the wings with craft glue; sprinkle lightly with crystal glitter. Use hot glue to secure bats around the house.

  10. Hot-glue raffia around the base of the house. Hot-glue the floral pumpkin in place.

Display your spooky house on a table or anywhere else that needs a good scare. Looking for a creepy way to welcome guests into your home -- or into a room? Try the chilling door hanger on the next page.

Want to scare up more fun Halloween ideas? Try these:

  • Halloween Crafts: Not done being creative? These are great do-it-yourself projects for Halloween, from trick-or-treat boxes to candy jewelry.
  • Kids' Halloween Costumes: Try on our unique costume ideas for your ghosts and goblins.
  • Halloween Masks: Want an easy way to dress up for Halloween? Try a mask instead of a costume. Check out our selection of monstrous masks.
  • Halloween Games: Play more than 20 spooktacular games to entertain kids and adults alike.
  • Halloween Recipes: Learn how to make dozens of bewitching Halloween treats.
  • ­How Halloween Works: Traces the popular holiday’s Celtic roots to American traditions celebrated today.
  • Pumpkin Carving Patterns: What's Halloween without pumpkin carving? Check out these great pumpkin carving patterns. 

My Little Mummy Door Hanger

This little mummy loves to hang around -- especially on Halloween!
This little mummy makes a
great Halloween decoration.

Not every aspect of Halloween has to be spooky.
This little mummy would just love to hang around at your next holiday haunting!

What You'll Need

  • 1-quart saucepan
  • 5 tea bags
  • 3/4 yard unbleached muslin, 60 inches wide
  • Scissors
  • Iron and ironing board
  • Straight pins
  • Pencil with eraser end
  • Sewing machine
  • Coordinating thread
  • Polyester fiberfill
  • Sewing and embroidery needles
  • 2 black E beads
  • Spray bottle
  • Paper towel
  • Plastic clothes hanger
  • 5 x 8-inch piece felt
  • 6 old buttons, assorted sizes
  1. Measure 3 cups of hot water into a saucepan. Steep tea bags, and let cool while you create the doll.

  2. Use photocopier to enlarge these doll body and tie My Little Mummy Door Hanger Halloween decoration patterns; cut out. Press muslin with iron if needed. Leaving a 2-inch border around all outside edges, pin body pattern to a doubled layer of muslin. Use sharpened pencil to trace around pattern, directly onto muslin. Remove pattern. Pin arms, legs, head, and stomach to prevent the layers from shifting during sewing. DO NOT cut out body yet.

    To keep the muslin layers from shifting, pin them.
    To keep the muslin layers from shifting, pin them.

  3. Sew body, stitching directly on pencil lines and beginning and ending at dot between legs. Backstitch at beginning and end to prevent seam from unraveling. Cut out, leaving 1/4-inch seam allowance around outside edge. Clip curves and inside corners to ease. Remove straight pins. Pinch 1 layer of fabric only at center of doll's back and cut a small slit (refer to pattern as a guide). Turn doll right side out through slit. Use eraser end of pencil to smooth head, arms, legs, and feet. Stuff with fiberfill. Eraser end of pencil can be used to push stuffing to extremities. Thread sewing needle with coordinating thread and whipstitch slit at back to close.

    To keep the muslin layers from shifting, pin them.
    Cut a small slit for the stuffing into the center of the mummy's back.

  4. Stitch E beads to head for eyes. For a more dimensional effect, begin at back side of head: Inserting needle through to front side, slip on bead, then return needle through head to back side again. Pull to embed (or sculpt) the eye into head. Repeat for remaining (bead) eye; whipstitch at back of head to secure thread ends.

  5. Tear 10 to 12 strips of muslin 1 inch wide and up to 60 inches long. Press if needed. Tie 3 knots in 1 strip to make the hanger.

  6. Begin wrapping mummy with all remaining strips, whipstitching a small dot at each end to hold firmly in place on doll. Once doll is partially wrapped, some ends can be tucked under other layers to hold in place or tied in some areas to create an "unraveling" appearance. Tie hanger to wrists as shown.

    Tie the hanger to the mummy's wrist.
    Tie the hanger to the mummy's wrist.

  7. Remove tea bags from saucepan and discard. Pour tea into spray bottle, and with doll held over a sink or water basin, spray lightly with tea mixture. Coat outer layer only; doll does not need to be completely saturated. Dab with paper towel to remove excess liquid, then reapply until desired effect is achieved. Hang the doll from plastic clothes hanger until dry.

  8. Pin tie pattern to felt and cut out. Cut a 1/2 x 8-inch strip of the same felt for neck portion of tie. Referring to dotted line on pattern, center top of necktie on felt strip. Fold top point of tie over strip and stitch a button on top to hold in place. Tie thin strips of scrap felt to hanger to accent. Stitch buttons to doll.

Your mummy friend is now ready to hang out all Halloween long. To give a festive fall touch to your Halloween bash, make a decoration that incorporates falling leaves. The step-by-step instructions for our colorful Falling Leaf Garland are on the next page.

Want to scare up more fun Halloween ideas? Try these:

  • Halloween Crafts: Not done being creative? These are great do-it-yourself projects for Halloween, from trick-or-treat boxes to candy jewelry.
  • Kids' Halloween Costumes: Try on our unique costume ideas for your ghosts and goblins.
  • Halloween Masks: Want an easy way to dress up for Halloween? Try a mask instead of a costume. Check out our selection of monstrous masks.
  • Halloween Games: Play more than 20 spooktacular games to entertain kids and adults alike.
  • Halloween Recipes: Learn how to make dozens of bewitching Halloween treats.
  • How Halloween Works: Traces the popular holiday’s Celtic roots to American traditions celebrated today.
  • Pumpkin Carving Patterns: What's Halloween without pumpkin carving? Check out these great pumpkin carving patterns. 

Falling Leaf Garland

Hang this quick and easy garland from your mantel or use it in your next holiday table arrangement to bring the season to life.

Colorful leaf garland is a versatile Halloween decoration.
Colorful leaf garland is a
versatile Halloween decoration.

What You'll Need

  • 9-1/4 x 12-inch sheet lightweight copper sheeting (.003 thick, 40 gauge)
  • Giant leaf paper punches
  • Craft foam or stack of newspapers
  • Blunt-tip stylus
  • Metal baking sheet
  • Embossing tool
  • Scrap paper
  • Disposable gloves
  • Makeup sponge
  • Rub-on metallic finish
  • Paper towel
  • Wire cutters
  • 2 yards nontarnish brass wire, 18 gauge
  • Round-nose jewelry pliers
  • Assorted beads: brown, green, earth-tone colors
  • Pencil or dowel
  • Embroidery needle
  1. Punch 12 to 15 leaves of assorted shapes from lightweight copper sheeting. Place leaves onto craft foam. Use blunt-tip stylus to emboss leaf veins in soft copper.

    Emboss leaf veins using a blunt-tip stylus.
    Emboss leaf veins using a blunt-tip stylus.

  2. One at a time, place leaves on baking sheet and heat with embossing tool to burnish, varying color tones from bright copper to shades of orange, rust, bluish-purple, and gold. Repeat for all leaves. Let cool.

  3. Place leaves on scrap paper, and with gloved hands use a makeup sponge to apply metallic finish. Let sit for 1 to 2 minutes, then wipe off excess with paper towel, buffing lightly while leaving color in grooves and corners. This gives a softened, antiqued look. Repeat for both sides of all leaves.

  4. Use wire cutters to snip several 3- to 5-inch lengths from brass wire; set aside. To make garland, use round end of jewelry pliers to curl a small loop at end of long brass wire. Slip a few beads onto opposite end of wire, and push them all the way down. Bend, curl, and loop wire as you work, adding beads wherever you want. Create spirals by wrapping wire around pencil or dowel.

    To create a spiral, wrap the wire around a pencil or dowel.
    To create a spiral, wrap the wire around a pencil or dowel.

  5. Put leaves on the craft foam sheet again. With an embroidery needle, pierce a small hole near stem of each. Insert a small piece of wire (from step 4) through each pierced hole; bend wire into a "U" shape, and wrap it around itself to hold leaf in place. Slip a few beads onto remaining length. Attach this piece to garland, bending a small loop around garland wire to hold it in place. Repeat for all leaves, alternating shapes and spacing leaves along length of garland.

    To hold the wire in place, bend a small loop in the wire.
    To hold the wire in place, bend a small loop in the wire.

You can use the finished garland in a multitude of ways: to enhance a Halloween centerpiece, decorate a Halloween tree, adorn walls and doors, and more. Another natural fall item -- the pumpkin -- is featured next. We'll teach you how to make a whimsical jack-o'-lantern that "jumps."

Want to scare up more fun Halloween ideas? Try these:

  • Halloween Crafts: Not done being creative? These are great do-it-yourself projects for Halloween, from trick-or-treat boxes to candy jewelry.
  • Kids' Halloween Costumes: Try on our unique costume ideas for your ghosts and goblins.
  • Halloween Masks: Want an easy way to dress up for Halloween? Try a mask instead of a costume. Check out our selection of monstrous masks.
  • Halloween Games: Play more than 20 spooktacular games to entertain kids and adults alike.
  • Halloween Recipes: Learn how to make dozens of bewitching Halloween treats.
  • How Halloween Works: Traces the popular holiday’s Celtic roots to American traditions celebrated today.
  • Pumpkin Carving Patterns: What's Halloween without pumpkin carving? Check out these great pumpkin carving patterns. 

Jumping Jack-o'-Lantern Decoration

Kids of all ages will love this jumping Jack.
Kids of all ages will love
this jumping Jack.

Make this Halloween decoration that is also a jolly toy for your favorite ghost or ghoul. Or, better yet, help them make it!

What You'll Need

  • White poster board
  • Pencil
  • Acrylic paint: orange, purple, green
  • Paintbrush
  • Felt markers: orange, green, permanent black
  • Scissors
  • 3 clear adhesive laminating sheets, 9 x 12 inches each
  • Large spoon
  • 1/8-inch hole punch
  • 4 paper brads
  • 1 yard perle cotton floss
  • 9.5mm bead
  1. Trace these Jumpking Jack-o'-Lantern Halloween decoration patterns onto dull side of poster board, drawing 1 leg and 1 arm and then reversing each to draw opposite arm and leg.

  2. Before cutting out, paint pumpkin head orange, hat purple, and dots green. On legs, paint wide purple stripes, then add narrow orange and green stripes with felt markers.

  3. Outline all pieces with black marker. Draw eyes, nose, and mouth, and color in shoes with black marker. Cut out all pieces.

  4. Following manufacturer's directions, sandwich each piece between 2 laminating sheets. Use back of a spoon to push out air bubbles. Trim laminate on all pieces to 1/8 inch of poster board edge.

    Sandwich the pieces between laminating sheets, pushing out any air bubbles.
    Sandwich the pieces between laminating sheets, pushing out any air bubbles.

  5. Use paper punch to punch holes where indicated on pattern.

  6. Attach arms and legs to pumpkin head with brads; place brads in lower holes on arms and legs. Be sure limbs swing freely.

  7. Place jack-o'-lantern face down, with arms and legs directed down. Thread embroidery floss through top hole of each arm. Pull floss taut, and tie a double knot around each hole. Repeat process for holes at top of each leg.

    Tie the floss around the bead.
    Tie the floss around the bead.

  8. Tie 14-inch length of floss to center of arm string. Pull floss down to make a loop knot around center of leg string. Tie floss end around bead. Pull bead to make Jack dance.

Hang Jumping Jack wherever you like -- in a window, on a door, or on a wall. Make sure you can reach the bead to make him jump and dance.

The next do-it-yourself decoration starts with a paint can. We'll show you how to turn it into a special Halloween decoration on the next page.

Want to scare up more fun Halloween ideas? Try these:

  • Halloween Crafts: Not done being creative? These are great do-it-yourself projects for Halloween, from trick-or-treat boxes to candy jewelry.
  • Kids' Halloween Costumes: Try on our unique costume ideas for your ghosts and goblins.
  • Halloween Masks: Want an easy way to dress up for Halloween? Try a mask instead of a costume. Check out our selection of monstrous masks.
  • Halloween Games: Play more than 20 spooktacular games to entertain kids and adults alike.
  • Halloween Recipes: Learn how to make dozens of bewitching Halloween treats.
  • How Halloween Works: Traces the popular holiday’s Celtic roots to American traditions celebrated today.
  • Pumpkin Carving Patterns: What's Halloween without pumpkin carving? Check out these great pumpkin carving patterns. 

Tricks or Treats Paint Can

Turn an ordinary paint can into a Halloween decoration.

What You'll Need

Make this tricks or treats can to store Halloween goodies.
Make this tricks or treats can
to store Halloween goodies.

  • 1-gallon empty paint can
  • Black spray paint
  • Textured cardstock: tangerine, purple
  • Paper trimmer
  • Ruler
  • Black inkpad
  • Pencil
  • Scissors
  • Craft glue
  • Striped patterned paper
  • Foam letter stamps
  • White paint
  • Foam brush
  • Black-and-white polka-dot ribbon: 1/8 inch wide, 7/8 inch wide
  • Black fabric-covered thin wire
  • Clear adhesive
  • 3 Halloween charms
  • Halloween labels
  • Paint can opener
  1. In a well-ventilated area, spray top of can lid. Let dry 30 minutes, and repeat. Let lid dry overnight.

  2. From tangerine cardstock, cut a 31/8 x 12-inch and a 31/8 x 85/8-inch strip. From purple cardstock, cut a 41/4 x 12-inch and a 41/4 x 85/8-inch strip. Ink edges of cardstock using inkpad.

  3. Wrap 12-inch tangerine strip around top of can, with equal lengths going past knobs of handles. Mark where knobs are on paper, and cut out. Glue strip to top of can. Glue 85/8-inch tangerine strip to back of can, matching seams. Glue purple strips to cover bottom of can.

    On the tangerine paper, mark where the knobs of the can's handles are.
    On the tangerine paper, mark where the knobs of the can's handles are.

  4. Tear left side of striped pattern paper to create a sloping shape, leaving bottom and left edges straight. Make another shape, tearing from right edge of paper. Glue first shape to purple cardstock, placing side edge below left handle knob and bottom edge at can bottom. Place second shape so straight edge abuts straight edge of other shape and bottom edge is at can bottom.

  5. Use foam letter stamps to spell "Trick or Treat" and "Boo" around can. Use foam brush to put white paint on letters. Dab excess paint off letters before stamping; don't worry about letters being perfect. This creates a spookier effect.

  6. Cut four 4-inch lengths from 1/8-inch ribbon. Tie 2 lengths to each side of handle. Measure and cut 27 inches of 7/8-inch ribbon. Wrap ribbon around can, covering seam between tangerine and purple papers. Tie a knot at front of can. Trim ribbon ends. Tie fabric-covered wire around ribbon knot, and curl ends. Place a dot of clear adhesive behind knot.

  7. Glue 2 charms and labels to front of can. From each of 3 papers, tear a small piece, about 2 x 2 inches each. Glue these to lid of can. Measure and cut a 53/8-inch length of 7/8-inch ribbon. Glue ribbon lengthwise across middle of lid. Glue last charm to ribbon.

  8. Cut 14-inch length of 7/8-inch ribbon. Tie can opener to handle with ribbon.

Your festive tricks or treats can is ready to fill with tempting Halloween goodies. If you're planning a big Halloween fright fest, make several cans to hold enough treats for the crowd. For more thrills, make a slinky snake to wrap around your treats can. Learn how to make this slithering Halloween decoration on the next page.

Want to scare up more fun Halloween ideas? Try these:

  • Halloween Crafts: Not done being creative? These are great do-it-yourself projects for Halloween, from trick-or-treat boxes to candy jewelry.
  • Kids' Halloween Costumes: Try on our unique costume ideas for your ghosts and goblins.
  • Halloween Masks: Want an easy way to dress up for Halloween? Try a mask instead of a costume. Check out our selection of monstrous masks.
  • Halloween Games: Play more than 20 spooktacular games to entertain kids and adults alike.
  • Halloween Recipes: Learn how to make dozens of bewitching Halloween treats.
  • How Halloween Works: Traces the popular holiday’s Celtic roots to American traditions celebrated today.
  • Pumpkin Carving Patterns: What's Halloween without pumpkin carving? Check out these great pumpkin carving patterns. 

Slinky Snake

Make your guests recoil in horror with this slinky snake decoration.
Make your guests recoil in horror
with this slinky snake decoration.

This Halloween decoration will coil around your heart.

What You'll Need

  • Wire: 14 gauge, 24 gauge
  • Wire cutters
  • Yardstick
  • Sandpaper
  • 3 feet black braided rope, 5/8-inch diameter
  • Paper clay
  • Round toothpick
  • Acrylic paint: black, yellow
  • Paintbrushes: 1/4-inch flat, #3
  1. Cut a 3-foot, 3-inch piece of 14-gauge wire. Sand one end to a point. Push wire into rope, leaving 11/2 inches of wire protruding on each end.

    Push the 14-gauge wire into the black rope.
    Push the 14-gauge wire into the black rope.

  2. At each end, bend 1/2 inch of wire up. Mold head and tail onto wire with paper clay.

  3. Cut two 1-inch pieces of 24-gauge wire. Twist wires together, leaving last 1/8 inch untwisted to form a forked tongue. Insert tongue into front of head. Use toothpick to make nostril holes. Let clay dry.

  4. Use 1/4-inch brush to paint head, tongue, and tail black. Use #3 brush to paint eyes yellow. Let dry.

  5. Form body into a coil.

Wrap the slinky snake anywhere you want to cause a fright: around a treats bowl or our Tricks or Treats Paint Can, around a door knob, around a centerpiece, and so on.

Looking for more unique decorating ideas for Halloween? Keep reading. We'll show you how to make Boo! Pots next.

Want to scare up more fun Halloween ideas? Try these:

  • Halloween Crafts: Not done being creative? These are great do-it-yourself projects for Halloween, from trick-or-treat boxes to candy jewelry.
  • Kids' Halloween Costumes: Try on our unique costume ideas for your ghosts and goblins.
  • Halloween Masks: Want an easy way to dress up for Halloween? Try a mask instead of a costume. Check out our selection of monstrous masks.
  • Halloween Games: Play more than 20 spooktacular games to entertain kids and adults alike.
  • Halloween Recipes: Learn how to make dozens of bewitching Halloween treats.
  • How Halloween Works: Traces the popular holiday’s Celtic roots to American traditions celebrated today.
  • Pumpkin Carving Patterns: What's Halloween without pumpkin carving? Check out these great pumpkin carving patterns. 

Boo! Pots

Looking for a quick-and-easy Halloween project that is sure to be an eye-catcher? Try making this Halloween decoration.

What You'll Need

These fun pots will BOOst your holiday decor.
These fun pots will BOOst your
holiday decor.

  • 4 x 4 x 2-inch foam block
  • Serrated knife
  • 4 clay pots, 3 inches each
  • Natural excelsior moss
  • Ribbon: 36 inches green, 3/4 inch wide; 36 inches purple wire-edge, 11/2 inches wide
  • Scissors
  • Pencil
  • 2 sheets double-sided super-sticky tape, 9 x 6 inches each
  • Aluminum armature wire, 1/16 inch diameter
  • Wire cutters
  • Hammer
  • Glass or metal baking dish
  • Assorted wiggle eyes, 3mm to 28mm
  • Tiny glass marbles: purple, green
  • Tiny green glass bead mix
  • 18-gauge black wire
  • Round-nose jewelry pliers
  • Black "E" beads
  1. Use serrated knife to cut foam block into 4 equal blocks. Insert a block into each clay pot, wedging it tightly inside. Remove foam, and trim so foam is 1/2 inch below top edge of pot. Replace foam in all pots.

  2. Cover foam with excelsior moss. Tuck edges of moss around foam, covering foam completely. Cut both ribbons in half. Wrap top edge of 2 pots with green ribbon, tie a knot, and V-cut ribbon ends. Repeat for remaining 2 pots using purple ribbon. Set pots aside.

    Use the excelsior moss to cover the foam completely.
    Use the excelsior moss to cover the foam completely.

  3. Use the Boo! Pots Halloween decoration PDF pattern to trace 4 O's, 2 B's (flip pattern to make back of B), 2 exclamation points, and 2 dots onto super-sticky tape. Cut out.

  4. Shape aluminum wire into framework for letters and exclamation point, making framework 1/4 inch smaller than shapes. Leave a 31/2-inch tail at bottom of all shapes. Hammer wire flat.

    Hammer the wire shapes flat.
    Hammer the wire shapes flat.

  5. Place a B and a backward B in baking dish, and peel off top protective layer. Press wiggle eyes in place. Pour purple tiny glass marbles over tape to coat. Carefully press front surface of B into marbles to fill any areas that weren't completely coated. Repeat process for all shapes. Note: For 2 O's (1 front and 1 back), use green glass bead mix, then fill in empty spaces with green glass marbles.

    Use the green glass beads and marbles for the letter O's.
    Use the green glass beads and marbles for the letter O's.

  6. Use front of shapes for this step. Remove protective layer from back of bead-coated shape, and place bead-side down onto a flat surface. Press framework onto sticky side. Replace protective layer. Attach framework to all letter fronts.

  7. For backs of all letters, remove backing from unbeaded side. Take off protective layer from letter fronts, and apply matching back to each shape. Should edges not match exactly, press appropriate color beads or marbles to coat. Repeat for all shapes. Insert wire tail into clay pot.

  8. Use jewelry pliers to bend and shape black craft wire, creating spooky shapes. Thread "E" beads onto wire, and space them throughout shape. Cut wire end, and insert into clay pot. The finished pots are ready to arrange and display.

If you're looking for truly bewitching Halloween decoration ideas, look no further than the next page. We've brewed up a special treat just for you.

Want to scare up more fun Halloween ideas? Try these:

  • Halloween Crafts: Not done being creative? These are great do-it-yourself projects for Halloween, from trick-or-treat boxes to candy jewelry.
  • Kids' Halloween Costumes: Try on our unique costume ideas for your ghosts and goblins.
  • Halloween Masks: Want an easy way to dress up for Halloween? Try a mask instead of a costume. Check out our selection of monstrous masks.
  • Halloween Games: Play more than 20 spooktacular games to entertain kids and adults alike.
  • Halloween Recipes: Learn how to make dozens of bewitching Halloween treats.
  • How Halloween Works: Traces the popular holiday’s Celtic roots to American traditions celebrated today.
  • Pumpkin Carving Patterns: What's Halloween without pumpkin carving? Check out these great pumpkin carving patterns. 

Witch's Brew of Surprises

This whimsical Halloween decoration holds trick-or-treat candy for all the cute critters who visit this October.

What You'll Need

Brew up some fun with this one-of-a-kind treat container.
Brew up some fun with this
one-of-a-kind treat container.

  • 1-gallon licorice container
  • Black spray paint for plastic
  • 1/6 yard Halloween-print fabric
  • Ruler
  • Fabric glue
  • Large quilting needle
  • Purple embroidery floss
  • Craft glue
  • Craft foam: orange, purple, black
  • Scissors
  • 2 empty toilet paper rolls
  • Black-and-white polka-dot ribbon, 1/8 inch wide
  • Scallop-edge scissors
  • 6 silver square mini brads
  1. Wash and dry container. In a well-ventilated area, spray lid and container inside and out with black paint. Let dry 20 minutes. Spray again to cover completely. Let dry overnight.

  2. From fabric, tear a 53/4-inch strip. Glue short ends together with fabric glue, matching right sides, to create a 1/4-inch seam. Let dry.

  3. With quilting needle and embroidery floss, make a running stitch 1/4 inch below untorn edge.

  4. Place fabric over lid handle. Gather fabric around knob. Tie ends of floss, and trim floss ends. Tuck edges of gathered fabric to inside so cut edge is against knob and doesn't show. Use craft glue to adhere fabric to knob; let dry.

    Tuck the edges of the fabric against the knob, covering it completely.
    Tuck the edges of the fabric against the knob, covering it completely.

  5. Cut four 11/2 x 53/8-inch strips of purple craft foam. Cut two 13/8 x 53/8-inch strips of orange craft foam. Cut out 2 boots from black foam using this pattern.

  6. Glue purple, then orange, then purple craft foam strips to a paper roll using craft glue; trim strips if needed. Be sure to line up seams. Repeat for second roll.

    Glue the ribbon along the seam of the craft foam.
    Glue the ribbon along the seam of the craft foam.

  7. Measure length of paper roll. Cut 2 ribbons to this length; glue a ribbon to each roll lengthwise along craft foam seams.

  8. Use scallop-edge scissors to trim 1 end of each roll. To each boot (cut out in step 5), add 3 brads where indicated on pattern. Fold rolls in half, with ribbon-covered seam in middle of back. Glue a boot inside scalloped edge of each roll. Hold roll until glue sets. These are the legs.

    Position the legs onto the fabric as shown.
    Position the legs onto the fabric as shown.

  9. At other end of rolls, cut 1/2-inch slits about every 1/2 inch. With seam of fabric placed in middle back of lid, decide where legs will be placed. Glue fabric to lid at these spots using craft glue. Glue tabs of legs over glued fabric.

For a gruesome Halloween decoration, how about some heads on a platter? Read on to get the full instructions for this frightful feast for the eyes.

Want to scare up more fun Halloween ideas? Try these:

  • Halloween Crafts: Not done being creative? These are great do-it-yourself projects for Halloween, from trick-or-treat boxes to candy jewelry.
  • Kids' Halloween Costumes: Try on our unique costume ideas for your ghosts and goblins.
  • Halloween Masks: Want an easy way to dress up for Halloween? Try a mask instead of a costume. Check out our selection of monstrous masks.
  • Halloween Games: Play more than 20 spooktacular games to entertain kids and adults alike.
  • Halloween Recipes: Learn how to make dozens of bewitching Halloween treats.
  • How Halloween Works: Traces the popular holiday’s Celtic roots to American traditions celebrated today.
  • Pumpkin Carving Patterns: What's Halloween without pumpkin carving? Check out these great pumpkin carving patterns. 

Heads on a Platter

Putting your heads together to discuss decorating is fun, but while you're talking, why not get "a head" of the game by making some nasty noggins? These shrunken heads are inexpensive and easy to make, and they can be made up to two weeks before you're planning to use them.

Preheat your oven to 150
°F. Using apples, potatoes, beets, or rutabagas (with the stems and leaves cut off), have your children carve out eye and mouth shapes using a spoon or, with your help, a butter knife. The cuts should go about 1/2 inch wide and deep to ensure the head's "melted" facial appearance. When you're finished carving, set the heads on a baking sheet covered with aluminum foil and slip them into the oven overnight.

These shrunken heads are a perfect centerpiece for your Halloween party.
These shrunken heads are a perfect
centerpiece for your Halloween party.

When the heads have cooled, place them on a platter for a table centerpiece. If you'd like something wackier, screw them on bamboo skewers and place them in houseplants, atop decapitated doll bodies, or even on a scarecrow's neck. To get really creepy, make hovering heads by skipping the bamboo skewers and stringing a needle and fishing line through the center of the head from bottom to top. Cut the line to the desired loop length, make a knot, and hang heads from the ceiling out of reach of your guests.

Want to incorporate all of your favorite Halloween frights -- like ghosts, witches, moons, stars, and bats -- into one Halloween decoration? You're in luck -- the High Spirits Mobile on the next page fits the thrill.

Want to scare up more fun Halloween ideas? Try these:

  • Halloween Crafts: Not done being creative? These are great do-it-yourself projects for Halloween, from trick-or-treat boxes to candy jewelry.
  • Kids' Halloween Costumes: Try on our unique costume ideas for your ghosts and goblins.
  • Halloween Masks: Want an easy way to dress up for Halloween? Try a mask instead of a costume. Check out our selection of monstrous masks.
  • Halloween Games: Play more than 20 spooktacular games to entertain kids and adults alike.
  • Halloween Recipes: Learn how to make dozens of bewitching Halloween treats.
  • How Halloween Works: Traces the popular holiday’s Celtic roots to American traditions celebrated today.
  • Pumpkin Carving Patterns: What's Halloween without pumpkin carving? Check out these great pumpkin carving patterns. 

High Spirits Mobile

Create a Halloween mobile for your kids to enjoy all month long.
Create a Halloween mobile
for your kids to enjoy all month long.

Your little ghoul or boy is certain to have sweet dreams before Halloween, but why wait until sleep takes over? Let a ghost mobile lull him or her to la-la land every night. Kids will love molding spooky shapes -- think ghosts, witches, moons, stars, and bats -- from homemade clay to make this Halloween decoration.

  1. In a small pot, bring the water to a boil. Remove pan from heat, and stir in salt. In a large heat-proof bowl, mix flours together. Slowly stir in hot saltwater. Knead resulting dough on a flour-covered surface.

  2. When dough is soft and pliable, kids can mold signature shapes or they can use cookie cutters. When finished, use a toothpick to make a small hole just above the center of each dough piece, and then bake the pieces on a cookie sheet at 250°F for 2 to 3 hours. Peek in on the pieces every 30 minutes after the first hour of baking to be sure they're baking evenly. Let shapes cool, and then decorate the pieces with paint, markers, and glitter. A clear acrylic spray finishes the job.

  3. Once dry, string fishing line or string through the pieces and attach them at varying lengths to 2 hooked-together wire coat hangers. Hang the mobile from a hook in the ceiling. Balance the weights, kick up some wind, then kick back with your creative kid to watch the mobile spin.

On the next page, learn how to put more fright into Halloween night with a creepy lampshade. We'll give you enlightening step-by-step instructions.

Want to scare up more fun Halloween ideas? Try these:

  • Halloween Crafts: Not done being creative? These are great do-it-yourself projects for Halloween, from trick-or-treat boxes to candy jewelry.

  • Kids' Halloween Costumes: Try on our unique costume ideas for your ghosts and goblins.

  • Halloween Masks: Want an easy way to dress up for Halloween? Try a mask instead of a costume. Check out our selection of monstrous masks.

  • Halloween Games: Play more than 20 spooktacular games to entertain kids and adults alike.

  • Halloween Recipes: Learn how to make dozens of bewitching Halloween treats.

  • How Halloween Works: Traces the popular holiday’s Celtic roots to American traditions celebrated today.
  • Pumpkin Carving Patterns: What's Halloween without pumpkin carving? Check out these great pumpkin carving patterns. 

Night Lights

Create a Halloween-themed lampshade.
Create a spooky-themed lampshade.

Send the children to bed with Halloween visions of flying witches, ghosts, moons, bats, and cats in their heads by making festive lampshade covers that can be removed after the holiday.

  1. Lay a large sheet of heavy black or navy construction paper on clear adhesive paper. Smooth out any wrinkles. Lay the lampshade on its side at the bottom right corner of a sheet of newspaper or butcher paper to make your template. Use a pencil to make a small mark on the lampshade where it first meets the paper; mark both the top and bottom of the shade.

  2. Slowly roll the lampshade toward the left, and use the pencil to trace the bottom path of the shade as you roll it. Continue rolling the shade until it has made a complete revolution, then roll the shade and add another inch for overlap.

  3. Roll the shade back to its starting point. Slowly roll the shade to the left again, this time using the top of the shade as a guide as you drag a pencil along the paper. If your shade is a cone shape, you will have a wide smile shape on the paper. If it is a cylinder, you will have a large rectangle shape.

  4. Trace pictures of your favorite Halloween scenes. Cut out the shape, and then use a craft knife to carefully cut out Halloween figures you want the light to shine through. Finally, wrap the paper around your lampshade with the construction paper facing out. Use clear tape to secure the seam. For extra fun, glue rickrack along the top and bottom of the shade.

For another way to set a spooky mood with lighting, try the Creepy Candles Halloween decoration project on the next page.

Want to scare up more fun Halloween ideas? Try these:

  • Halloween Crafts: Not done being creative? These are great do-it-yourself projects for Halloween, from trick-or-treat boxes to candy jewelry.
  • Kids' Halloween Costumes: Try on our unique costume ideas for your ghosts and goblins.
  • Halloween Masks: Want an easy way to dress up for Halloween? Try a mask instead of a costume. Check out our selection of monstrous masks.
  • Halloween Games: Play more than 20 spooktacular games to entertain kids and adults alike.
  • Halloween Recipes: Learn how to make dozens of bewitching Halloween treats.
  • How Halloween Works: Traces the popular holiday’s Celtic roots to American traditions celebrated today.
  • Pumpkin Carving Patterns: What's Halloween without pumpkin carving? Check out these great pumpkin carving patterns. 

Creepy Candles

Create easy Halloween decorations with these simple, yet stunning, candles. Fill large cans with water, and freeze them. (Soup cans tend to be too small and bend the image or words.) Draw basic outlines of Halloween shapes or exclamations ("Eeek!," "Boo!," and "Yikes!" work well) on sheets of paper. When the water inside the cans is completely frozen, tape your designs to the outside of the cans.

Draw shapes onto the cans to make your own Halloween candles.

Use a hammer and nail to make holes about an 1/8 inch apart along the lines of the designs. (Adult help is needed if children are crafting.) When finished, remove the paper. Run warm water over cans to loosen ice; discard ice. Dry cans, and add painted decorations.

When paint is dry, put sand in can bottoms for extra weight. Place small candles in the sand, set your lanterns out, and have an adult fire them up for a ferociously festive glow.

Is your house haunted? You can make it haunted by incorporating the clever ideas on the next page of this article. Read on for the ghastly details.

Want to scare up more fun Halloween ideas? Try these:

  • Halloween Crafts: Not done being creative? These are great do-it-yourself projects for Halloween, from trick-or-treat boxes to candy jewelry.
  • Kids' Halloween Costumes: Try on our unique costume ideas for your ghosts and goblins.
  • Halloween Masks: Want an easy way to dress up for Halloween? Try a mask instead of a costume. Check out our selection of monstrous masks.
  • Halloween Games: Play more than 20 spooktacular games to entertain kids and adults alike.
  • Halloween Recipes: Learn how to make dozens of bewitching Halloween treats.
  • How Halloween Works: Traces the popular holiday’s Celtic roots to American traditions celebrated today.
  • Pumpkin Carving Patterns: What's Halloween without pumpkin carving? Check out these great pumpkin carving patterns.  

Haunted House

Buy the creepy things you're afraid to touch and place them throughout your house for a Horrifying Halloween Party.
Buy the creepy things you're afraid to
touch and place them throughout your
house to set the horrifying mood.

Slimy snakes, nibbling rats, a slew of spiders, and all the creepy things that haunt your dreams -- that's the stuff of nightmares. This Halloween, haul those horrors out of naptime and let them -- OK, rubber imitations of them -- hang about your house for a truly terrifying Halloween decoration.

Party stores keep a monstrous stock of rubber vermin and insects on the shelves at Halloween; buy the ones you can't bare to touch and then plant them in surprising spots around your house. A rat in the sink, a snake in the coat closet, and worms writhing out of the sofa cushions make for revolting surprises. Keep stashes of plastic spiders in your pocket for tossing into the air when guests least expect it.

In the party room, a black light and cobwebs stretched from cotton batting create an eerie glow. Confirm guests' suspicions that the place is haunted by tossing white sheets or canvas tarps over furniture. Not only will your upholstery be protected from partygoers, you'll attain that abandoned house look found in all those old horror movies.

Of course, no house can be haunted without the help of a few ghosts. Hang one in a high corner, from a ceiling fan, or from a doorframe under which guests must pass. Stuff one corner of a large white plastic trash bag with 2 bunched-up trash bags. Twist a neck under the head, then fold the excess plastic skirt over the bulge and twist again, securing the resulting round head with a rubber band or string. Make a fluttering ghost by cutting the bottom of the skirt into long strips. A creepy soundtrack of low moans, wails, and screams played throughout your gathering will complete the eerie effect.

Table for Ewww...

You may appreciate a cheery dining room, but as endless fright flicks prove, apparitions appreciate an aged place. Date yours by tossing a white sheet over the tabletop and dressing it like an old banquet table. Plastic goblets or wine chalices are a must. Got some tarnished silver? Set it out -- unpolished.

Add some cotton spider-webbing to a candelabra stacked with melted but unlit candles. Pepper the dishes with plastic spiders. And for a true antique finish, fill the centerpiece with rotting food (plastic fruit covered with cobwebs).

Witches, spider, and bats -- oh my! Read the next page to learn how to transform your home into a hex-cellent place for a Halloween gathering.

Want to scare up more fun Halloween ideas? Try these:

  • Halloween Crafts: Not done being creative? These are great do-it-yourself projects for Halloween, from trick-or-treat boxes to candy jewelry.
  • Kids' Halloween Costumes: Try on our unique costume ideas for your ghosts and goblins.
  • Halloween Masks: Want an easy way to dress up for Halloween? Try a mask instead of a costume. Check out our selection of monstrous masks.
  • Halloween Games: Play more than 20 spooktacular games to entertain kids and adults alike.
  • Halloween Recipes: Learn how to make dozens of bewitching Halloween treats.
  • How Halloween Works: Traces the popular holiday’s Celtic roots to American traditions celebrated today.
  • Pumpkin Carving Patterns: What's Halloween without pumpkin carving? Check out these great pumpkin carving patterns.  

Hex House

Dress the house with bats, cats, and spiders to create the magical environment for a Halloween party.
Dress the house with bats, cats,
and spiders to create the environment.

Create a hex house for your Halloween festivities. Dressing the house to suit a witch's or wizard's fancy is a cinch. Start off this Halloween decoration by hanging a black umbrella from a short length of fishing line strung from a ceiling hook or turned-off light fixture. Cut out black bats from paper or fun foam. Glue on wiggle eyes, and add some dimensional paint. Dangle the bats at different lengths from fishing line attached to the tips of the umbrella's rods. These look fantastic when given a whirl.

If you don't have an umbrella handy, don't opt out of the black bats. You can still string them from the ceiling using fishing line and strong clear tape. Silver balloons filled with half air and half helium will hover hauntingly in the air.

If you're confident in your abilities to keep an eye on the kids while keeping the party moving, consider getting some dry ice. When mixed with a little hot water, the dry ice vaporizes and froths like a real witch's cauldron. This looks great set in an empty fireplace or kitchen corner. You can often purchase the ice from party stores. Just be sure to keep a close eye on curious fingers.

Finish the room display with a black light, a black cat cutout in the window, and, of course, one giant stuffed spider. You can make your own simply by stuffing the legs of four pair of black nylons with newspaper or cotton batting and safety pinning the remaining waists to a puffy pillow covered in a black pillowcase or fabric.


For added effect, paint a big foam ball black, glue on big wiggly eyes (find them at a local craft store), add some chenille stem antennae, and make smiling fangs. This spider looks great lounging atop a tall bookcase or plopped smack dab in the middle of the party room.

Black and/or purple streamers, tablecloth, and eating utensils give the aura of a witch's or wizard's mealtime. But why stop there? Fill a Halloween bowl with gummy worms, candy corn (monster's toenails), cinnamon candies (blood drops), mini-marshmallows (ghost tears), and corn curls (troll fingers) to make the spells stick.

You can use glow sticks for stubby wands, or create magical ones with 12-inch long dowels. You'll need one for each guest. Use black permanent marker or paint to cover all but the bottom 4 inches to avoid the dreaded inky curse. You can cover that end with duct tape or colored electrical tape. At the top end of the wands, tie on ribbons of foil stars, feathers, or curly wrapping ribbon. Place a magic wand at each guest's place setting.

Take a step back in time by decorating for Halloween the rustic way. Continue reading to learn how to bring an old-fashioned touch to today's Halloween festivities.

Want to scare up more fun Halloween ideas? Try these:

  • Halloween Crafts: Not done being creative? These are great do-it-yourself projects for Halloween, from trick-or-treat boxes to candy jewelry.
  • Kids' Halloween Costumes: Try on our unique costume ideas for your ghosts and goblins.
  • Halloween Masks: Want an easy way to dress up for Halloween? Try a mask instead of a costume. Check out our selection of monstrous masks.
  • Halloween Games: Play more than 20 spooktacular games to entertain kids and adults alike.
  • Halloween Recipes: Learn how to make dozens of bewitching Halloween treats.
  • How Halloween Works: Traces the popular holiday’s Celtic roots to American traditions celebrated today.
  • Pumpkin Carving Patterns: What's Halloween without pumpkin carving? Check out these great pumpkin carving patterns.   

Rustic Halloween Decorations

Step back in time to the days before plastic pumpkins sat in the yard and real ones came pureed in a can. These Halloween decorations will take you back to basics and your guests back in time.

There's nothing artificial about displaying the fruit of fall's labor. Gourds, pumpkins, and apples make a beautiful display when stacked around the house. For a down-home look, set them on shelves, next to the front door, then roll in the wheelbarrow or small wagon and stack them inside.

Wood baskets and crates -- you can usually get them for free at your grocery store -- make great fruit and veggie showpieces, too. For that warm harvest gold glow, set out a few electric lanterns or dig out your electric candles from the Christmas decoration stash. Use pretty rust-colored ribbon to tie dried bunches of wheat or Indian corn around the room.

Create a beautiful hearth with fall decorations for this historical Halloween party.
Create a beautiful hearth
for this Halloween party.

While you're bringing the outside in, why not prop a scarecrow in the party room? Stuff an old shirt and overalls with newspaper, and knot a few bunches of raffia and let them dangle out of the sleeves and pant cuffs. Give a nod to the tale of Ichabod Crane and his Headless Horseman by leaving this scarecrow empty from the neck up.

Or, if your young crowd requires a noggin, tie an old dish towel over a balled up bunch of fabric -- rags or T-shirts will do -- and use a permanent marker to draw a cheerful scarecrow face. If you have enough raffia, tie it around small boxes to create hay bales.

Give the kitchen an old-world feel by draping an autumn-colored tablecloth or runner across the table, then spice up the color scheme with vibrant green, yellow, or orange napkins and dinnerware. Got a rustic salad bowl? Surround it with coffee cups and fill it with hot apple cider.

Make a beautiful centerpiece by trimming twigs so they are equal in length, then hot glue them to the sides of a clean aluminum soup can (with the label removed). When the glue is dry, tie raffia ribbon around it and set some dried flowers inside. Scatter leaf cutouts or dried leaves about the table and even on the floor. Simple paper chains made of orange, brown, and yellow construction paper complete the old-fashioned effect.

Looking for another theme for Halloween decor? Try a skull-and-crossbones pirate theme. On the next page, we'll float a bounty of pirate ideas by you.

Want to scare up more fun Halloween ideas? Try these:

  • Halloween Crafts: Not done being creative? These are great do-it-yourself projects for Halloween, from trick-or-treat boxes to candy jewelry.
  • Kids' Halloween Costumes: Try on our unique costume ideas for your ghosts and goblins.
  • Halloween Masks: Want an easy way to dress up for Halloween? Try a mask instead of a costume. Check out our selection of monstrous masks.
  • Halloween Games: Play more than 20 spooktacular games to entertain kids and adults alike.
  • Halloween Recipes: Learn how to make dozens of bewitching Halloween treats.
  • How Halloween Works: Traces the popular holiday’s Celtic roots to American traditions celebrated today.
  • Pumpkin Carving Patterns: What's Halloween without pumpkin carving? Check out these great pumpkin carving patterns.   

Pirate Ship Halloween Decorations

Want to plunge guests to the depths of the sea? Go where only sunken ships and sailors dare to tread.

Decorate your party room to look like a pirate's ship.
Decorate your party room
to look like a pirate's ship.

The first step in submerging your Halloween decor to the depths of a watery grave: Plug in a black light. It'll cast an eerie underwater glow and highlight colorful but spooky cutouts of octopus, sea creatures, and ghost-shaped seaweed. Use clear fishing line to float a few cutouts or fish from the ceiling, and stick some cutouts behind poster board "portholes" hung low on the party room walls.

Because captain and crew go down with their ship, hang and lay plastic or cardboard skeletons around the room. Decorate a few skeletons with deflated inflatable life rings, pirate eye patches, and scarves. Drip fake pearls and costume jewelry from the skeletons' hands. Hang sea netting (found at party supply stores) on the walls, and hang starfish or a snagged pirate from it. A skull and crossbones flag will add more pirate-y charm.

Pirate bounty Halloween decoration.
Pirate bounty.

Buy inexpensive Mardi Gras and pearl beads and mix them with gold-wrapped chocolate coins. Scatter them across the serving table for pirate booty. A treasure chest is a great centerpiece. Find one at a Halloween or craft store, or create your own by papering a shoe box with brown construction paper; make the "hinge" with silver or black tape. Fill it with old costume jewelry and trinkets, and leave it open. Or, for giggles, "lock" it with a big buckle from an old belt but hide a spooky surprise inside, such as a skull. Curious kids will love the gag.

Lay seashells around the rooms. To complete the ambience, play a nature CD of the sea: lapping oceans waves or storm sounds work well, but haunting whale calls will hook captains craving the creepiest sounds.

When kids arrive at the door, blindfold each and invite them to step into the deep by walking the plank, which is a board set on the floor at the entry to the party. Will they take the plunge?

For a completely different Halloween scene, try a haunted garden decor that includes creepy creatures like bugs, spiders, and even man-eating plants. We'll tell you everything you need to create your own ghoulish garden on the next page.

Want to scare up more fun Halloween ideas? Try these:

  • Halloween Crafts: Not done being creative? These are great do-it-yourself projects for Halloween, from trick-or-treat boxes to candy jewelry.
  • Kids' Halloween Costumes: Try on our unique costume ideas for your ghosts and goblins.
  • Halloween Masks: Want an easy way to dress up for Halloween? Try a mask instead of a costume. Check out our selection of monstrous masks.
  • Halloween Games: Play more than 20 spooktacular games to entertain kids and adults alike.
  • Halloween Recipes: Learn how to make dozens of bewitching Halloween treats.
  • How Halloween Works: Traces the popular holiday’s Celtic roots to American traditions celebrated today.
  • Pumpkin Carving Patterns: What's Halloween without pumpkin carving? Check out these great pumpkin carving patterns.   

Haunted Garden Decorations

Decorate the party room like a haunted garden.
Decorate the party room
like a haunted garden.

Go beyond the garden gate to transform an ordinary room into a haunted garden. For this Halloween decoration, twist orange and green streamers in loose loops along the walls and ceiling or use camouflage netting. Use the same colors for tableware. Signs that say "Beware of Man-Eating Plants" and "Please Don't Feed the Wildflowers" won't keep kids off the lawn but will keep them giggling if you stick them in and around your houseplants.

Since man-eating plants are always bloodthirsty, keep watering cans at the ready and drip long, stringy licorice from the spouts into small white cups stenciled with the Red Cross logo.

Spread plants along high shelves and bookcases of the party room, and position a lively looking one as a centerpiece on the kitchen table. Place snack-size sealable plastic bags filled with cinnamon candy (to look like blood drops) at each setting. Attach plastic tubing (find it at a hardware or pet store) from the bags to the plant to look like IVs.

Scatter plastic bugs, spiders, and other garden pests around the table. It's only natural that gourds belong at this garden party, too. Pile a few by the door; you could even carve or paint gaping mouths on them. A fog machine adds chilling special effects.

Do you prefer more traditional fall decorations for your Halloween gathering? We've got you covered. Read on for do-it-yourself fall decor ideas.

Want to scare up more fun Halloween ideas? Try these:

  • Halloween Crafts: Not done being creative? These are great do-it-yourself projects for Halloween, from trick-or-treat boxes to candy jewelry.
  • Kids' Halloween Costumes: Try on our unique costume ideas for your ghosts and goblins.
  • Halloween Masks: Want an easy way to dress up for Halloween? Try a mask instead of a costume. Check out our selection of monstrous masks.
  • Halloween Games: Play more than 20 spooktacular games to entertain kids and adults alike.
  • Halloween Recipes: Learn how to make dozens of bewitching Halloween treats.
  • How Halloween Works: Traces the popular holiday’s Celtic roots to American traditions celebrated today.
  • Pumpkin Carving Patterns: What's Halloween without pumpkin carving? Check out these great pumpkin carving patterns.   

Fall Decorations

These darts are a fun Halloween game for a non-scary Halloween party.
Decorate the party room
with straw and fall leaves.

Bring the season to your Halloween decor by stocking up on raffia. This crumpled paper ribbon resembles hay and can be found at any craft store. Make a scarecrow head by bunching up old newspaper and covering it with raffia. Use hot glue to hold if needed.

Leave the head like this, or decorate it with button eyes, a cutout nose and mouth, and a real corncob neck. Top the head with a straw hat. Set the head on top of an outfit stuffed with clothes or newspapers that you've positioned in a chair, and then stuff the arm and pant cuffs with a little raffia. You can also wind a couple layers of raffia around small boxes to create indoor haystacks.

Fall just isn't fall without falling leaves, so string some leaf-shaped accordion streamers (find them at party supply stores) along the walls, windows, and door frames. Don't want to buy any? Make your own streamers by gathering leaves from the yard. Soak curled ones in a bowl of warm water for a few minutes to soften, pat dry with paper towels, and then press them in a book for a few days. Tie the stems onto a length of ribbon to make a garland.

For a more permanent garland, lay each leaf between 2 squares of waxed paper, smooth a dishtowel on top, and then press an iron (set on low-heat, no steam) onto the towel. The waxed paper will seal the leaf inside. Cut around each leaf, and string them using a needle and embroidery thread. Then hang the garland around the room.

While you've got the ladder out, hang a yellow poster board harvest moon outlined with gold glitter, as well as some silver stars. Arrange some colorful gourds for the table centerpiece.

Next, learn how to give your Halloween get-together a magical, mystical ambience. Get the enchanting details for some magical Halloween decorations in the next section.

Want to scare up more fun Halloween ideas? Try these:

  • Halloween Crafts: Not done being creative? These are great do-it-yourself projects for Halloween, from trick-or-treat boxes to candy jewelry.
  • Kids' Halloween Costumes: Try on our unique costume ideas for your ghosts and goblins.
  • Halloween Masks: Want an easy way to dress up for Halloween? Try a mask instead of a costume. Check out our selection of monstrous masks.
  • Halloween Games: Play more than 20 spooktacular games to entertain kids and adults alike.
  • Halloween Recipes: Learn how to make dozens of bewitching Halloween treats.
  • How Halloween Works: Traces the popular holiday’s Celtic roots to American traditions celebrated today.
  • Pumpkin Carving Patterns: What's Halloween without pumpkin carving? Check out these great pumpkin carving patterns.   

Magic Castle

Help guests suspend disbelief with a charming scene of Halloween decorations when throwing a Halloween party.
Help guests suspend disbelief
with a charming scene.

Ensure that guests suspend disbelief at the door by elevating their imaginations with a charming scene that suggests they're stepping into a mystical dream with these magical Halloween decorations.

Begin their walk into this enchanted kingdom by draping a row of purple streamers over the entryway. On one side -- the party room -- turn on a black light for guests who aren't afraid of the dark. Extend that ethereal feel by hanging stars wrapped in white paper or foil from the ceiling. (Under a black light, white-papered stars glow purple; silver shines in any light.)

Create a book of spells by picking up an old dictionary or encyclopedia from a thrift store and pasting two tea-stained pages to the open pages. Employ your most spidery handwriting to scratch out a spell or two, and leave the book open for the curious.

Pick up some black and silver balloons from the party store the day of the party. Have them filled halfway with helium and the other half with a mix of helium and air. Scatter these throughout the house for a cool levitating effect. Tape stained-glass cellophane onto your windows for a fun castle feel.

In the kitchen, black rules: A black tablecloth and black paper dishware are a nice start to a magical table. Hook eight black chenille stems through the edge of each guest's paper plate to create spider plates. Toss a handful of shiny sequins across the cloth, and in the center, create a crystal ball by stuffing an overturned fishbowl or round vase with silvery ribbon.

No bowl or vase? No problem. Cover a sport ball (a basketball or soccer ball works great) with foil, and set it in a small bowl to keep it from rolling.

Whenever spells are in the air, superstitions are, too. Keep kids on their toes by leaning a ladder against a wall (have adults keep watch so kids don't try to climb), and set out a stuffed toy or cardboard black cat so all the kids have to walk past it. Leave a spilled saltshaker on the kitchen table.

Have a few prizes ready for any kids who recognize the superstitious possibilities and avert misfortune! Help out little ones by setting a few spooky signs near the potential misstep, warning of the old wives' tales they're about to encounter. For example, next to a piece of tape laid across the carpet to resemble a crack, hang a sign that says, "Step on a crack, break your mother's back."

Scary, creepy, funny, mystical, or downright horrifying -- Halloween decorations can be any of these and more. Use the projects in the article to create your dream (or nightmare) Halloween scene. Or, let them inspire you to scare up your own one-of-a-kind Halloween decorations.

Want to scare up more fun Halloween ideas? Try these:

  • Halloween Crafts: Not done being creative? These are great do-it-yourself projects for Halloween, from trick-or-treat boxes to candy jewelry.
  • Kids' Halloween Costumes: Try on our unique costume ideas for your ghosts and goblins.
  • Halloween Masks: Want an easy way to dress up for Halloween? Try a mask instead of a costume. Check out our selection of monstrous masks.
  • Halloween Games: Play more than 20 spooktacular games to entertain kids and adults alike.
  • Halloween Recipes: Learn how to make dozens of bewitching Halloween treats.
  • How Halloween Works: Traces the popular holiday’s Celtic roots to American traditions celebrated today.
  • Pumpkin Carving Patterns: What's Halloween without pumpkin carving? Check out these great pumpkin carving patterns.   

Friendly Witch

This friendly witch is perfect to welcome Halloween visitors, and she will last a lot longer than the holiday's sweet treats!

Follow our steps to make this friendly witch doll, a perfect Halloween decoration.
This easy-to-make friendly witch makes an excellent greeter for all your trick-or-treaters.

What You'll Need

  • 18-inch premade muslin doll
  • Green acrylic paint
  • Paintbrush
  • Red fine-tipped permanent marker
  • Powder blush makeup
  • Scissors
  • 1/2 yard black broadcloth
  • Sewing machine and black thread
  • Needle and thread
  • 5 star buttons
  • 2 moon/star buttons
  • 1/2 yard Halloween print fabric
  • Iron
  • 24 inches black ribbon, 1/16-inch wide
  • Tacky glue
  • 6-inch black felt witch hat
  • 12 inches satin orange ribbon, 3/4-inch wide
  • Waxed paper
  • Glow-in-the-dark dimensional paint: orange, yellow
  • Skein orange yarn
  • 12x4-inch cardboard hair template

Instructions

  1. Paint two green dots on doll face for eyes. Draw smile with permanent red marker. Let dry. Brush on cheeks with powder blush. Apply blush lightly until satisfied with color.
  2. Use our friendly witch pattern -- which can be downloaded as a PDF -- to create the pieces you'll need for the friendly witch. Cut black broadcloth in half. Using the pattern, fold one broadcloth piece on FOLD line and cut. Repeat with other broadcloth piece. Slit along solid fold line. Following pattern instructions, sew with 1/4-inch seam allowance. Clip corners and turn romper right side out. Slip romper on doll through neck opening. Turn raw edges of neckline down 1/4 inch and sew a running stitch around neckline. Knot off.
    Fit the friendly witch into her black romper, and fold the neckline over on your Halloween decoration.
    Once the friendly witch is in her romper,
    fold the neckline to hide the raw edge
    and stitch to hold it in place.
  3. Turn sleeves under 1/4 inch and gather with a running stitch. Gather at doll's elbow and knot off. Turn pant hems under 1/4 inch and gather with running stitch. Gather at ankle and knot off.

    Gather the friendly witch's pants at the ankle to complete the romper on this Halloween decoration.
    Gather the pants at the friendly witch's ankles
    to make sure she stays in her romper.

  4. Center three star buttons on front of romper, and sew them to romper. First button should be 1/2 inch from top of neckline, and buttons should be spaced 1 inch apart. Sew moon/star buttons to outside bottom of romper legs.

    Sew festive buttons on the friendly witch's romper to add fun to this Halloween decoration.
    The friendly witch is quite an accessorizer.
    She has ideas for every detail of her outfit.

  5. Sew side and bottom seams on cape (use Halloween print). Fold top raw edge of cape down 1 inch (wrong sides together) and iron crease. Sew a running stitch across cape 1 inch down from top. Gather to neckline. Place cape on doll. To measure, pull gathers until ends surround face, but don't cover face. Knot off. Sew last two star buttons to cape. Cut black ribbon into three 8-inch pieces. Glue ribbons to inside of cape, even with star buttons. Allow glue to set.
  6. Wrap orange ribbon around base of hat. Tie ribbon into simple bow. Trim ribbon. Tack ribbon to hat with a small amount of glue.
  7. With leftover black material, cut two pieces of fabric that are 6x7 inches. Place one piece on waxed paper. Write "Trick or Treat" on the fabric with orange glow-in-the-dark paint. Dot yellow glow-in-the-dark paint around the writing. Allow paint to dry 24 hours. Fold tops of fabric down 1 inch. With right sides together, sew bag together with 1/4-inch seam allowance. Turn bag. Glue last piece of 8-inch ribbon to bag for handle.

    Use black material and paint pens to make the friendly witch a trick-or-treat sack and complete this Halloween decoration.
    She's not just going to sit in that chair all night.
    The friendly witch loves trick-or-treating, too.

  8. Wrap yarn around a 12-inch hair template about 20 times (depending on how thick yarn is). Cut one end of yarn from template. Remove three strands. Find center of hair and use a yarn strand to tie a temporary knot at center. Measure 31/4 inches down from center and tie a permanent knot. Repeat for other side. Remove temporary knot. Apply a thin line of glue across top of doll's head. Slightly twist hair between permanent knots, place hair over glue, and hold in place. Make sure ponytails are balanced on doll's head. Once glue has set, tack hair to doll with needle and thread and knot off. If hair doesn't seem secure, apply more glue under hair line and hold in place until glue sets.
This witch is cute and friendly, but she needs her freedom. She might even take a turn trick-or-treating with the kids. If you're looking for something to stay still and adorn a door, continue to the next page for instructions on constructing a Halloween wreath.

Want to scare up more fun Halloween ideas? Try these:

  • Halloween Crafts: Not done being creative? These are great do-it-yourself projects for Halloween, from trick-or-treat boxes to candy jewelry.
  • Kids' Halloween Costumes: Try on our unique costume ideas for your ghosts and goblins.
  • Halloween Masks: Want an easy way to dress up for Halloween? Try a mask instead of a costume. Check out our selection of monstrous masks.
  • Halloween Games: Play more than 20 spooktacular games to entertain kids and adults alike.
  • Halloween Recipes: Learn how to make dozens of bewitching Halloween treats.
  • How Halloween Works: Traces the popular holiday’s Celtic roots to American traditions celebrated today.
  • Pumpkin Carving Patterns: What's Halloween without pumpkin carving? Check out these great pumpkin carving patterns.   

Halloween Wreath

In many homes, a wreath welcomes the holiday season, so why not start the door decorating a little sooner? This fun and easy-to-make Halloween wreath is essential to any home's Halloween decoration.

Make a plan grapevine wreath into a fun Halloween decoration with our easy instructions for a Halloween wreath.
Fun and festive, this Halloween wreath adds seasonal spirit to any door.

What You'll Need
  • Tracing paper
  • Pencil
  • Cold-press watercolor paper, 300#
  • Scissors
  • Craft knife
  • Acrylic paint: snow white, dove gray, shading flesh, buttermilk, pumpkin, ebony black, mint julep, red iron oxide, cadmium yellow, light avocado
  • Paintbrushes: #2 flat, 3/8-inch angle, 10/0 liner
  • Acrylic matte-finish spray
  • Grapevine wreath, medium size
  • 3 yards ribbon, 3/4-inch wide
  • 24 inches ribbon, 1/8-inch wide
Instructions
  1. Download the PDF of our Halloween wreath decoration pattern and transfer it to the watercolor paper. Use scissors to cut out the basic shape, then clean cut the corners and cut holes for ties with craft knife.
  2. Use flat brush to base-coat the sign with snow white paint. Base-coat the cat with dove gray and the cat nose with shading flesh. Base-coat background under cat with buttermilk. Base-coat pumpkin with pumpkin paint and base-coat pumpkin eyes and mouth with ebony black. Base-coat pumpkin stem and leaves with mint julep. Allow to dry. Apply detail to pattern.

    Use watercolor paper and paints to start making the ornament that will adorn your Halloween wreath.
    Paint the larger areas of color first. You'll add details next.

  3. Contour pumpkin ridges by "floating" with red iron oxide. Float the dimensions of the pumpkin face with cadmium yellow. Float the stem and leaves with light avocado. Float the contours of the cat with ebony black and line the features with ebony black.

    Use a floating brush technique to add detail to your Halloween wreath's ornament.
    Carefully create fur on this Halloween kitty
    using black paint and careful brushing.

  4. Use liner brush to line pumpkin with ebony black. Paint "HAPPY HALLOWEEN" with ebony black and add dots. Paint vine with light avocado. Allow to dry. Spray with acrylic matte-finish spray.

    Use a liner brush to add the final touches and a Halloween message to your Halloween wreath.
    Finish the lettering and details with the tiniest of brushes.

  5. Wrap 3/4-inch-wide ribbon around wreath and tie in a decorative bow. Thread a 1/8x24-inch piece of ribbon through tie holes in the ornament so that the free ends are at the back. Tie the ornament to the wreath.

How about another way to combine spooky Halloween spirit with lovely fall home decor? On the next page you'll learn to create a floral jack-o'-lantern.

Want to scare up more fun Halloween ideas? Try these:

  • Halloween Crafts: Not done being creative? These are great do-it-yourself projects for Halloween, from trick-or-treat boxes to candy jewelry.
  • Kids' Halloween Costumes: Try on our unique costume ideas for your ghosts and goblins.
  • Halloween Masks: Want an easy way to dress up for Halloween? Try a mask instead of a costume. Check out our selection of monstrous masks.
  • Halloween Games: Play more than 20 spooktacular games to entertain kids and adults alike.
  • Halloween Recipes: Learn how to make dozens of bewitching Halloween treats.
  • How Halloween Works: Traces the popular holiday’s Celtic roots to American traditions celebrated today.
  • Pumpkin Carving Patterns: What's Halloween without pumpkin carving? Check out these great pumpkin carving patterns.   

Floral Jack-O'-Lantern

This floral jack-o'-lantern will delight the hearts of young and old and can make Halloween cheer a part of any household.

This Halloween decoration combines a terra cotta container with dried flowers to produce a floral jack-o'-lantern.
Festively floral, this jack-o'-lantern has
a hat that puts real pumpkins to shame.

What You'll Need

  • 7-inch terra cotta jack-o'-lantern or 7-inch terra cotta container
  • Black acrylic paint (optional)
  • Paintbrush (optional)
  • 3x5-inch piece dry foam
  • Hot glue gun
  • Glue sticks
  • Handful Spanish moss
  • Greening pins
  • 9 pieces dried rust-colored wheat
  • Scissors
  • 3 stems dried dock
  • 3 stems dried strawflowers
  • 1 twig dried bronze canella
  • 2 stems preserved brown oak leaves
  • 1 stem dried love grass
  • 1 stem dried protea green
  • 4 strings peach raffia ribbon
  • Florist wire

Instructions

  1. If using a plain terra cotta container, paint a jack-o'-lantern face on the outside with black acrylic paint. Let dry.
  2. Glue the dry foam to the inverted hat of the jack-o'-lantern. Set the inverted hat on top of the pumpkin head, and moss lightly. Secure the moss with greening pins. Cut the rust-colored wheat in half, and insert each half horizontally into the sides of the foam.

    Moss and dried wheat provide the base for this floral jack-o'-lantern's display.
    Work from the bottom to create the jack-o'-lantern's jaunty floral cap.

  3. Place the dock vertically in the center of the arrangement. Add the strawflowers from the base of the hat and work upward. Place the bronze canella in the lower right corner, allowing it to cascade downward. Fill in with brown oak leaves, love grass, and protea green as desired.

    Add additional dried flowers to your floral jack-o'-lantern Halloween decoration's flowery display.
    Getting bigger...

  4. Make a bow from the raffia, and attach it to the right side of the jack-o'-lantern with wire.

    With the finishing touches in place, this floral jack-'o-lantern Halloween decoration is a resounding success.
    Ta-da! Wrap that raffia into a bow,
    and your floral jack-o'-lantern is a tremendous success.

This next Halloween decoration is one for the whole family. Have the kids gather 'round to help create Junior and his Mummy! Click to the next page to find out what to do.

Want to scare up more fun Halloween ideas? Try these:

  • Halloween Crafts: Not done being creative? These are great do-it-yourself projects for Halloween, from trick-or-treat boxes to candy jewelry.
  • Kids' Halloween Costumes: Try on our unique costume ideas for your ghosts and goblins.
  • Halloween Masks: Want an easy way to dress up for Halloween? Try a mask instead of a costume. Check out our selection of monstrous masks.
  • Halloween Games: Play more than 20 spooktacular games to entertain kids and adults alike.
  • Halloween Recipes: Learn how to make dozens of bewitching Halloween treats.
  • How Halloween Works: Traces the popular holiday’s Celtic roots to American traditions celebrated today.
  • Pumpkin Carving Patterns: What's Halloween without pumpkin carving? Check out these great pumpkin carving patterns.   

Junior and His Mummy

Wind some thrills and chills around these fun Halloween decorations featuring Junior and his Mummy. They're sure to provide a RIP-roaring time for the whole family.

Use clothespins and cheesecloth to create these funny Junior and his Mummy Halloween decorations.
Mummy! Mummy! Is it time for the party yet?

What You'll Need

  • Small and large clothespin dolls
  • Tacky glue
  • Muslin: two 4x3-inch pieces and two 31/4x21/2-inch pieces (optional)
  • Ruler
  • Sewing machine and white thread (optional)
  • Polyester fiberfill (optional)
  • Low-temp glue gun (optional)
  • Glue sticks (optional)
  • White acrylic paint
  • Paintbrush
  • 3 yards cheesecloth
  • Scissors
  • 2 comical plastic eyes, 12.5mm each
  • 1 yard black satin ribbon, 1/16-inch wide
  • Miniature fall leaves
  • Miniature pumpkin
  • Miniature pumpkin treat bag
  • Flocked bat

Instructions

  1. Assemble clothespin dolls. For fabric arms, fold 31/4x21/2-inch muslin pieces to measure 31/4x11/4 inches. Sew along short end and length with 1/4-inch seam allowance. Turn arms and stuff firmly with fiberfill, leaving 1/4 inch at opening. Working with one arm at a time, apply low-temp glue to shoulder of doll. Press raw edges of arm into wood. Arm should be secure and stand straight out from side of body. Repeat for all arms. Let glue set.

    Use a glue gun to attach fabric arms to the clothespins as you create Junior and his Mummy Halloween decorations.
    Mummy and Junior must have arms.

  2. Paint entire doll with white paint. Apply second coat of white if needed. Let dry.
  3. Cut cheesecloth into 1-inch-wide strips. Starting with large mummy, apply a line of tacky glue along bottom edge of body. Place a strip of cheesecloth on top of glue. Press cloth into wood. Trim excess cloth from bottom. Starting at back of body, place a small amount of glue on one leg. Attach one end of strip to glue and wrap around leg, ending at top of leg. Secure end of strip with glue. Repeat for other leg. Continue wrapping strips of cheesecloth around body and arms. Start and end at back, slightly overlapping strips. At head, apply crossing lines of glue. Place strips across head. While wrapping, allow some pieces to hang about 2 to 4 inches from mummy at body, arm, and head. Twist cloth gently. Repeat to wrap Junior.

    With their bodies formed, use glue and strips of cheesecloth to transform Junior and his Mummy into mummy Halloween decorations.
    Nothing says love like a snug cheesecloth wrapping,
    so wind those mummies tight.

  4. Remove shanks from eyes. Glue eyes to mummies. Make a simple bow with black ribbon and glue to large mummy. Glue leaves and pumpkin to large mummy hand. Glue pumpkin treat bag to Junior's arm. Glue flocked bat to Junior's body at front.

    Use pliers to remove shanks from plastic eyes before putting them on the Junior and his Mummy Halloween decorations.
    Work carefully as you remove the shanks from the eyes.
    You want your mummies to have good vision.

Sure, Halloween can be scary, but it's also full of friendly characters like these mummies. On the next page you'll meet -- and learn to make -- another friendly face: Henrietta Witch.

Want to scare up more fun Halloween ideas? Try these:

  • Halloween Crafts: Not done being creative? These are great do-it-yourself projects for Halloween, from trick-or-treat boxes to candy jewelry.
  • Kids' Halloween Costumes: Try on our unique costume ideas for your ghosts and goblins.
  • Halloween Masks: Want an easy way to dress up for Halloween? Try a mask instead of a costume. Check out our selection of monstrous masks.
  • Halloween Games: Play more than 20 spooktacular games to entertain kids and adults alike.
  • Halloween Recipes: Learn how to make dozens of bewitching Halloween treats.
  • How Halloween Works: Traces the popular holiday’s Celtic roots to American traditions celebrated today.
  • Pumpkin Carving Patterns: What's Halloween without pumpkin carving? Check out these great pumpkin carving patterns.   

Henrietta Witch

Henrietta is a nice witch, and she's sure to delight all the little ghosts and goblins. Put this friendly witch on your front porch to make even the smallest trick-or-treaters feel welcome.

This Henrietta witch doll is an easy-to-make Halloween decoration.
Henrietta Witch is more
sweet than spooky.

What You'll Need
  • 1/4 yard unbleached muslin
  • 1 package tan dye
  • Tracing paper
  • Pencil
  • Cardboard or plastic
  • Scissors
  • Water-erasable marker or fabric-marking pencil
  • Pins
  • Sewing machine
  • Cream thread
  • Needle
  • 10 ounces polyester fiberfill
  • 1/4 yard each: brown-and-black check, brown plaid, and black fabrics
  • 2 small black beads
  • 10 inches red embroidery floss
  • Powder blush makeup
  • 1 ounce wool roving
  • Craft glue
  • 1/2 yard black ribbon, 1/8-inch wide
  • 11/2x4-inch piece gold-brown fabric
  • Wooden meat skewer

Instructions

  1. Wash and dry muslin. Do not use fabric softener. Following manufacturer's directions, dye muslin with tan dye in sink.
  2. Using our Henrietta witch pattern, which you can download as a PDF, trace the shapes onto cardboard or plastic and cut them out. Note that leg-shoe is one piece, and the seam line is marked.

    Trace the Henrietta witch pattern pieces onto paper and cut them out to start making this Halloween decorations.
    Cut carefully, as this step determines
    what Henrietta will ultimately look like.

  3. With muslin folded (9x22 inches), use the plastic or cardboard pieces to trace arms and head-body, leaving 1/2 inch between pieces. Traced lines are seam lines. Cut around all pieces 1/4-inch away from seam lines.
  4. Stitch around arms, leaving top open. Clip curves and turn right side out. Stuff with polyester fiberfill to 1 inch below top. Baste top closed.

    Stuff Henrietta witch's arms in this next step of Halloween decorating.
    Use fiberfill to give Henrietta's arms some shape.

  5. Stitch from A to B around head. Pin arms in place at sides. Stitch sides, catching arms in seams. Clip curves and turn right side out.

    Attach arms to the body as you make this Henrietta witch Halloween decoration.
    Be sure to attach Henrietta's arms
    as you make her body's seams.

  6. Cut a 21/2x15-inch piece from black fabric; cut 9x15-inch piece from muslin. Stitch pieces together along 15-inch side and press seam toward black fabric. On wrong side of doubled fabric, trace leg-shoe twice, lining up seam line with seam. (Remember to leave 1/2 inch between pieces.) Cut out leg-shoe 1/4 inch from traced lines.

    Sew black fabric and muslin together to create Henrietta witch's leg and shoe in one step.
    If only getting our own shoes on were this easy.

  7. Stitch around leg-shoe on traced lines, leaving top open. Clip curves and turn right side out. Stuff with polyester fiberfill to 11/4 inches below top. Place seams side by side and baste across the top.

    Use a sewing machine or needle and thread to seal in the stuffing in Henrietta witch's legs.
    Keep Henrietta's legs shapely by sealing in the stuffing.

  8. Pinch face together to form nose and take two stitches through pinched fabric and fiberfill. Stitch on small black beads for eyes. With red floss, embroider mouth. Using a finger, put blush on cheeks.
  9. Trace and cut out dress and sleeves from checked fabric, vest from plaid, and hat from black.
  10. Stitch dress at shoulder seams, and stitch sleeves to dress. Fringe bottom of sleeves by cutting slits 1 inch deep and 1/4 inch apart. Stitch sleeve and side seams. Fringe bottom of dress in the same manner as sleeves. Hem neck opening. Place dress on doll and gather at neck and sleeves above fringe.

    Use scissors to fringe the hem and sleeves of Henrietta witch's dress.
    A fringed hem gives Henrietta's dress that witchy look.

  11. Cut front vest at fold line. Hem vest armholes, neck, front, and bottom. Stitch shoulder seams. Place vest on doll.
  12. Using craft glue, glue wool roving on doll to form hair. Use fingers to lightly comb hair. Stitch back seam on hat and turn right side out. Turn brim of hat up in front and glue in place. Glue hat on doll's head. Tie black ribbon into a bow and glue to front neck of dress.

    Use craft glue to attach wool roving to Henrietta witch for hair on this Halloween decoration.
    Give Henrietta a coif to be proud of -- or at least to be scared of...

  13. Fringe gold-brown fabric in same manner as sleeves. Glue to end of meat skewer. Roll fabric around bottom of skewer, gluing as you roll to form the friendly witch's broom. Stitch broom to Henrietta witch's hands at thumbs.

    Fabric and a meat skewer combine to create a broom for this Henrietta witch Halloween decoration.
    A girl's gotta get around, so be sure to make Henrietta witch a broom.

  14. Stitch legs to front body at opening, making sure feet are forward. Stuff head and body with fiberfill, and stitch opening closed.
All this friendliness is rather pleasant, so don't stop now. Continue to the next page to make a warm Halloween welcome sign.

Want to scare up more fun Halloween ideas? Try these:

  • Halloween Crafts: Not done being creative? These are great do-it-yourself projects for Halloween, from trick-or-treat boxes to candy jewelry.
  • Kids' Halloween Costumes: Try on our unique costume ideas for your ghosts and goblins.
  • Halloween Masks: Want an easy way to dress up for Halloween? Try a mask instead of a costume. Check out our selection of monstrous masks.
  • Halloween Games: Play more than 20 spooktacular games to entertain kids and adults alike.
  • Halloween Recipes: Learn how to make dozens of bewitching Halloween treats.
  • How Halloween Works: Traces the popular holiday’s Celtic roots to American traditions celebrated today.
  • Pumpkin Carving Patterns: What's Halloween without pumpkin carving? Check out these great pumpkin carving patterns.   

Halloween Welcome Sign

Welcome ghosts and goblins, bogeymen, and witches with this hand-painted Halloween welcome sign plaque.

This handpainted Halloween welcome sign is a friendly sight for trick-or-treaters and a Halloween decoration you'll keep for years.
Come and get the candy!

What You'll Need
  • 8 x131/2-inch oval wood plaque
  • Fine sandpaper, #200
  • Tack cloth
  • Wood sealer
  • Paintbrushes: Foam or 1­-inch flat, small flat, 1/2-inch flat, 3/8-inch angle, 10/0 liner
  • Acrylic paints: ebony black, dove gray, pumpkin, snow white, flesh tone, raw sienna, avocado, burnt orange, light cinnamon, gooseberry pink
  • Tracing paper
  • Pencil
  • Acrylic matte spray
Instructions
  1. Sand wood with fine sandpaper and use tack cloth to remove dust. Apply wood sealer to outer edge of plaque with a foam or 1­-inch flat brush. Let dry. Paint outer edge with ebony black using small flat brush, and paint plaque with dove gray using 1/2-inch flat brush. Let dry. Download our handy Halloween welcome sign pattern as a PDF, and apply basic outlines of pattern (just shapes) to the plaque using tracing paper and pencil.

    After sanding your wooden plaque, use paints and a paintbrush to begin making the Halloween welcome sign.
    Fill in the large areas of color first.

  2. Using the small flat paintbrush, paint pumpkin costume and small pumpkin with pumpkin paint; the treat bag and ghost costume with snow white; the skin with flesh tone; the hair with raw sienna; the leaf and legs with avocado; and the pumpkin faces, ghost's eyes and shoes, child's eyes, and handles with ebony black.
  3. Apply detail pattern lines to the plaque. Float several shades for added definition with an angle brush: shade pumpkins with burnt orange; skin with light cinnamon; ghost, ghost's shoes, and treat bag with dove gray; leaf, legs, and floor with ebony black; and child's cheeks with gooseberry pink.

    Add details to the painted characters on your Halloween welcome sign to bring this Halloween decoration to life.
    With added details, the characters start to come alive.

  4. Using 10/0 liner brush, line hair with light cinnamon. Line shapes and bows with ebony black.

    After painting the characters on your Halloween welcome sign, add a message to this Halloween decoration.
    The tiniest of brushes helps make your trick-or-treaters pop!

  5. Apply pattern for words and line with ebony black. Apply letter dots with ebony black using the wooden end of paintbrush, redipping in paint for each dot. Finish and preserve your Halloween welcome sign by spraying with acrylic matte spray. After it's dry, hang it up in just the right place!

    Put the final touches on your Halloween welcome sign, and then this Halloween decoration is ready to go.
    The friendly message is the final touch. Now, stock up on candy!

Once you've welcomed them in, keep the decorations coming to hold their interest. Click to the next page to create a Halloween mobile that doubles as a fun conversation starter.

Want to scare up more fun Halloween ideas? Try these:

  • Halloween Crafts: Not done being creative? These are great do-it-yourself projects for Halloween, from trick-or-treat boxes to candy jewelry.
  • Kids' Halloween Costumes: Try on our unique costume ideas for your ghosts and goblins.
  • Halloween Masks: Want an easy way to dress up for Halloween? Try a mask instead of a costume. Check out our selection of monstrous masks.
  • Halloween Games: Play more than 20 spooktacular games to entertain kids and adults alike.
  • Halloween Recipes: Learn how to make dozens of bewitching Halloween treats.
  • How Halloween Works: Traces the popular holiday’s Celtic roots to American traditions celebrated today.
  • Pumpkin Carving Patterns: What's Halloween without pumpkin carving? Check out these great pumpkin carving patterns.   

Halloween Mobile

This Halloween mobile spooks from above. It's more catching than a cobweb in the corner, and also includes no spiders (whew!).

Made from foam and ribbon, this Halloween mobile decoration is easy to construct.
Simply spooktacular!

What You'll Need

  • Tracing paper
  • Pencil
  • Scissors
  • Foam sheet: 5x5 inches yellow; 3x6 inches orange; 3x7 inches white; 5x5 inches black
  • Paper punch
  • Fine-point opaque paint markers: brown, black
  • Thick craft glue
  • Wiggle eyes: eighteen 12mm; four 5mm
  • 58 inches black satin ribbon, 1/8 inch wide
  • Ruler
  • 1/4-inch black pom

Instructions

  1. Using our Halloween mobile pattern, which you can download as a PDF, trace and cut the following shapes from foam: one moon in yellow; two pumpkins in orange; two skulls in white; and one bat, one cat head, and one set of cat paws in black. Use the paper punch to make holes in the foam shapes in the places indicated on the patterns.

    Use a paper punch to make holes to attach your Halloween shapes to the Halloween mobile you're creating.
    Punch precisely so your mobile
    components will hang straight.

  2. Decorate both sides of the pumpkins by drawing lines with the brown marker and faces with the black marker; let dry. Draw faces on both sides of the skulls with the black marker; let dry. Glue two 5mm eyes on both sides of the bat. Glue two 12mm eyes on both sides of the pumpkins and skulls.

    Glue eyes to the foam shapes to bring your Halloween mobile to life.
    Better to see you with, my Halloween pretty!

  3. Cut a 12-inch length of ribbon. Insert one end of the ribbon 11/2 inches into the single hole at the top of the moon. Tie a double knot in the ribbon to securely attach it to the moon. Trim the short end of the ribbon close to the knot. Position and glue the cat head on the back upper side of the moon. Position and glue the cat paws on the front of the moon, with the right paw covering the ribbon hanger. Glue the black pom nose on the cat head so that the nose slightly overlaps the edge of the moon, and glue two 12mm eyes to the cat head.

    Use ribbon to start stringing the parts of your Halloween mobile together.
    Glue the cat on carefully
    to hide your hanger holes.

  4. Cut the remaining ribbon into the following lengths, and use double knots to tie one end of each length to each foam shape and the other end to a hole at the bottom of the moon: a 6-inch length for one pumpkin; a 9-inch length for one skull; a 13-inch length for the bat; an 11-inch length for one pumpkin; and a 7-inch length for one skull. Trim the ends of each length of ribbon close to the knot.

    Cut ribbons to hang shapes from your Halloween mobile, then trim the ribbons on your finished Halloween decoration.
    Dangle these darlings at different lengths
    so they can all be easily seen.

Scary, creepy, funny, mystical, or downright horrifying -- Halloween decorations can be any of these and more. Use the projects in the article to create your dream (or nightmare) Halloween scene. Or, let them inspire you to scare up your own one-of-a-kind Halloween decorations.

Want to scare up more fun Halloween ideas? Try these:

  • Halloween Crafts: Not done being creative? These are great do-it-yourself projects for Halloween, from trick-or-treat boxes to candy jewelry.
  • Kids' Halloween Costumes: Try on our unique costume ideas for your ghosts and goblins.
  • Halloween Masks: Want an easy way to dress up for Halloween? Try a mask instead of a costume. Check out our selection of monstrous masks.
  • Halloween Games: Play more than 20 spooktacular games to entertain kids and adults alike.
  • Halloween Recipes: Learn how to make dozens of bewitching Halloween treats.
  • How Halloween Works: Traces the popular holiday’s Celtic roots to American traditions celebrated today.
  • Pumpkin Carving Patterns: What's Halloween without pumpkin carving? Check out these great pumpkin carving patterns.   
ABOUT THE CRAFT DESIGNERS:
Ghoulish Glow Candles by Amy Belonio
Crystal Ball by Amy Belonio
Hats Off to Wizards Centerpiece by Diane Hardy
Glowing Window Panes by Diane Hardy
Wacky Halloween Ornaments by Sharon Osborn
Spooky Sparkly Door Charm by Karen and Ann Mitchell
Bewitching Branch by Amy Belonio
Fuzzy Fun Wreath by Laurie D'Ambrosio
There's a Party in the Graveyard Centerpiece by Diane Hardy
Boo Pillow Pattern by Sharon Miller Cindrich
Haunted Hat Snapshot Holder by Sharon Miller Cindrich
Spooky House Centerpiece by Sharon Miller Cindrich
My Little Mummy Door Hanger by Lisa Galvin
Jumping Jack-o'-Lantern Decoration by Phyllis Dunstan
Tricks or Treats Paint Can by Jennette Warren
Slinky Snake
by Marge Wirsbinski
Boo! Pots
by Lisa Galvin
Witch's Brew of Surprises
by Jennette Warren
Friendly Witch by Maria Nerius
Floral Jack-'O-Lantern by Maria J. Buscemi
Junior and His Mummy by Maria Nerius
Henrietta Witch by Vicki Schweitzer
Halloween Welcome Sign by Carol Neu
Halloween Mobile by Cindy Groom Harry and Staff, Designs & Consultation

Advertisement

Loading...